


Gabion Wall

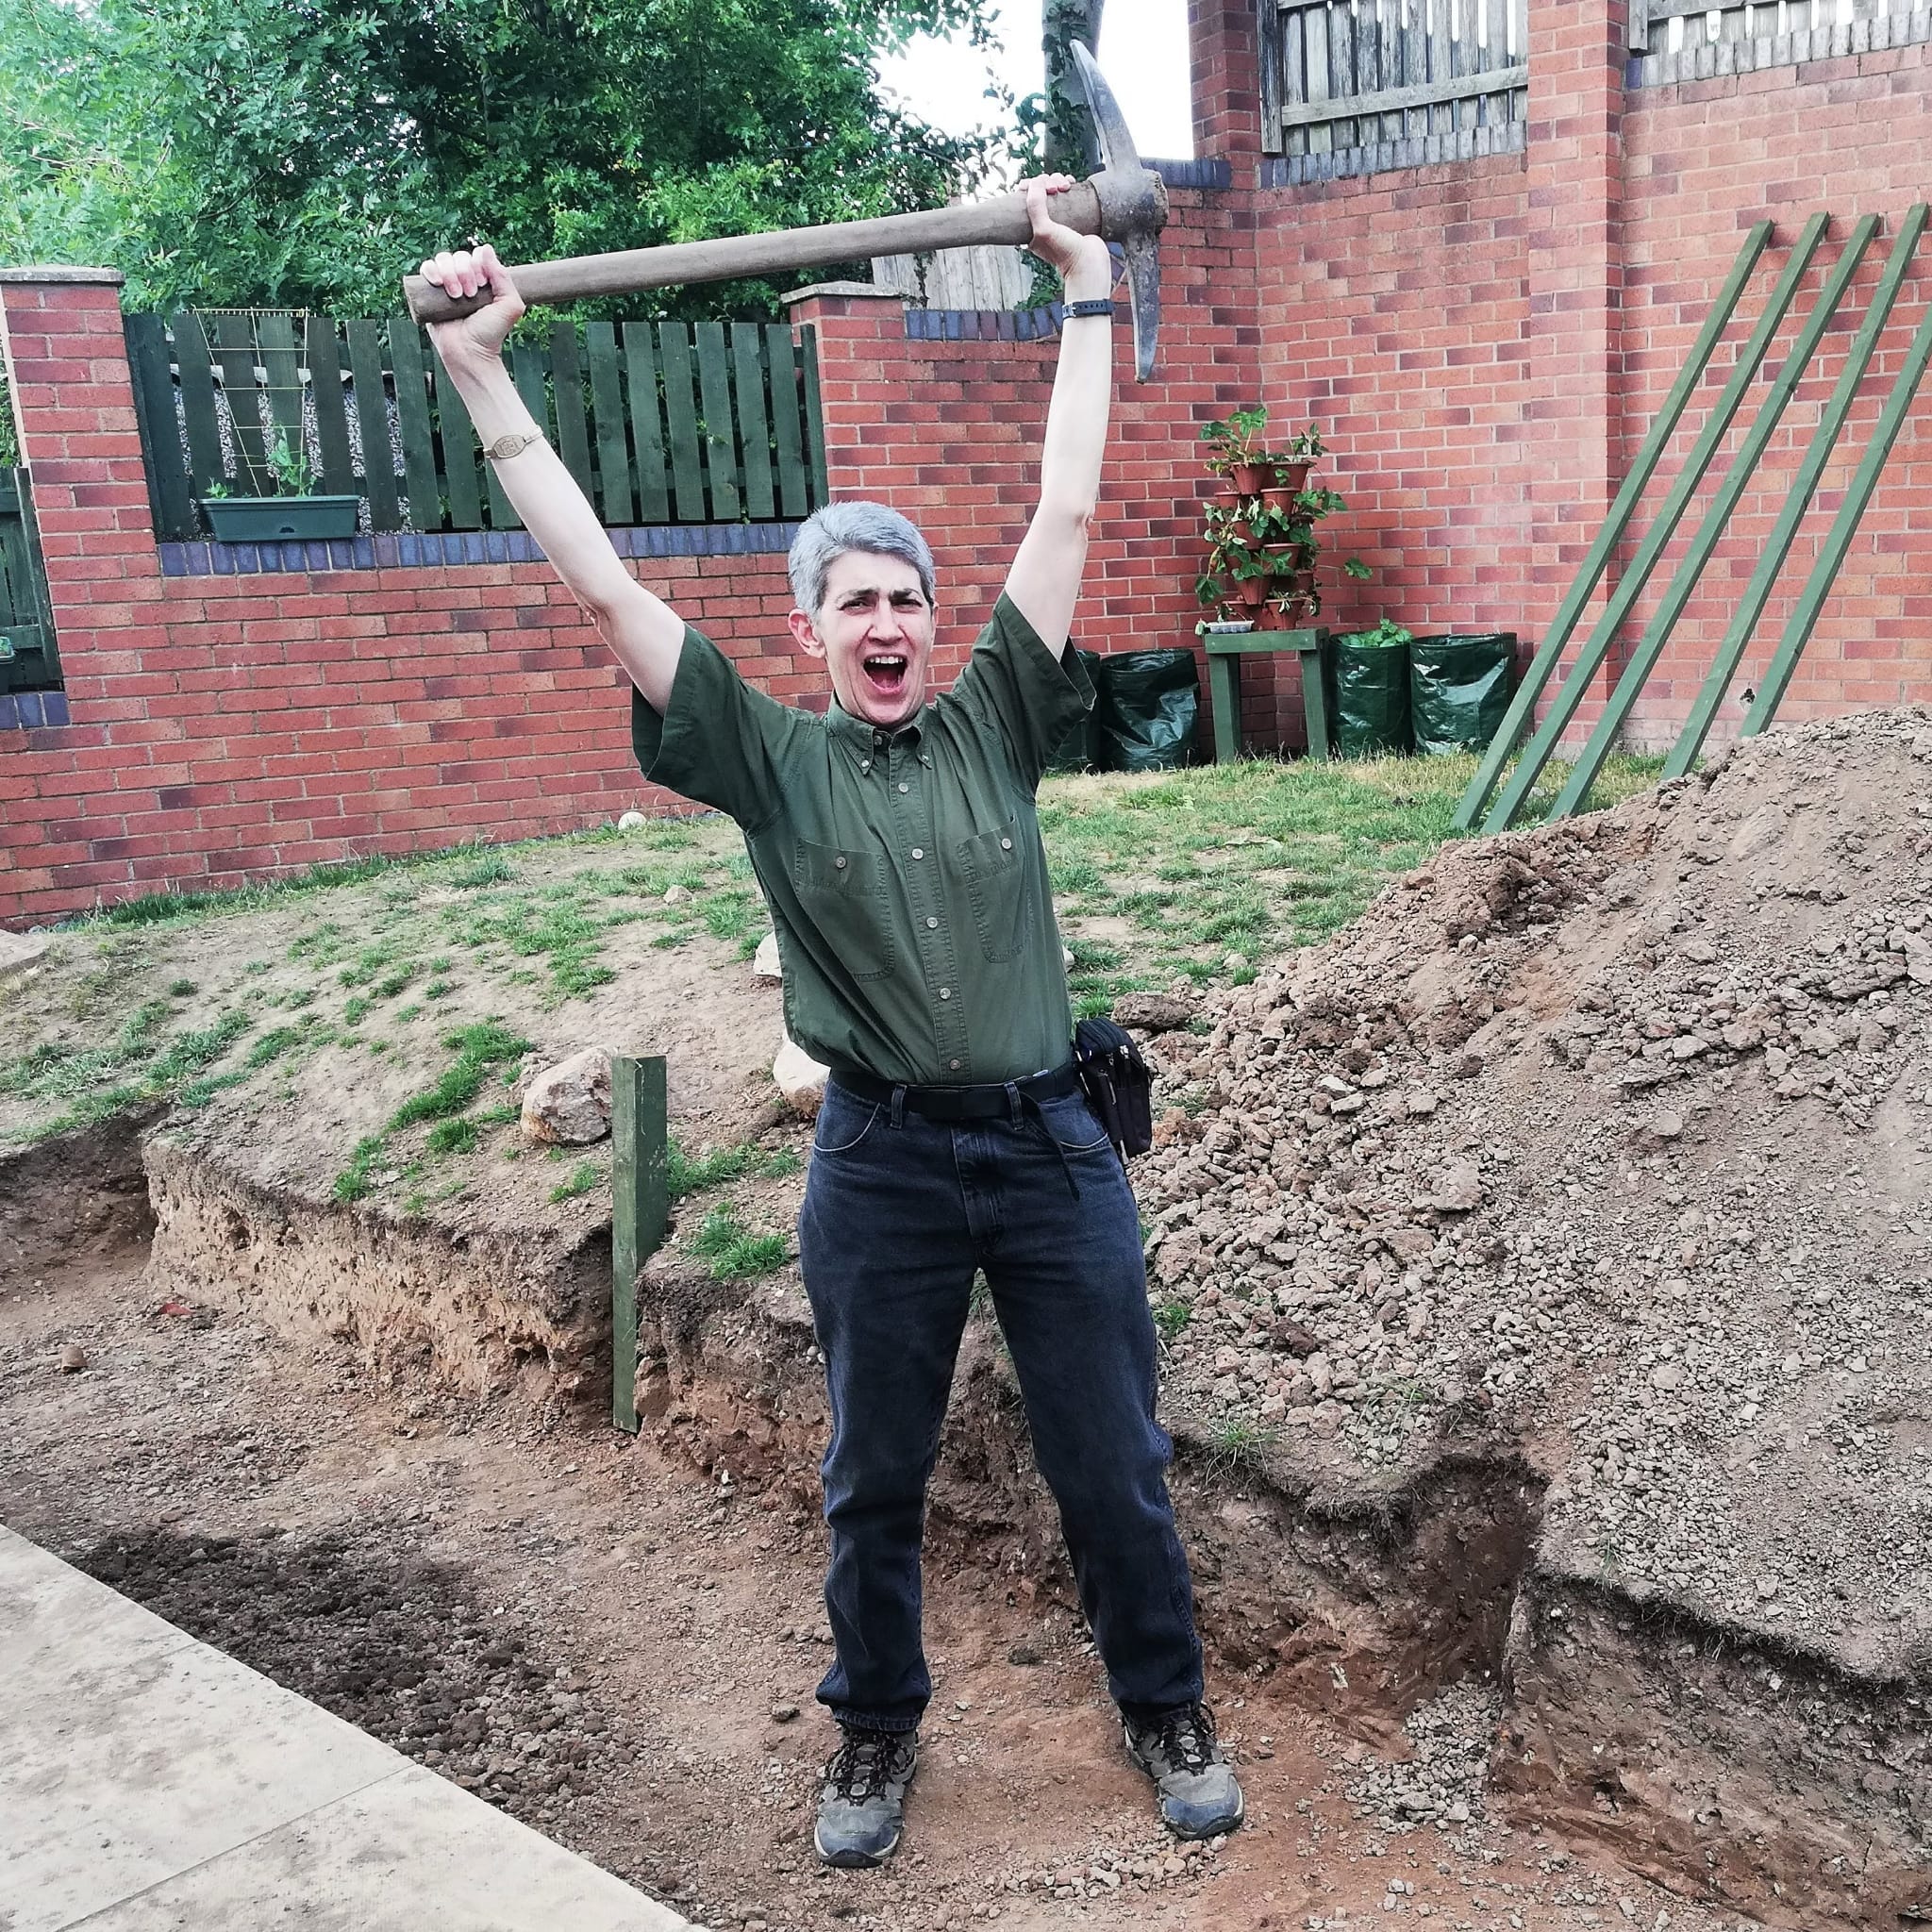
(Photo by V, copyright 2020)
Finishing the gabion trench was a milestone, but plenty of work lay ahead.
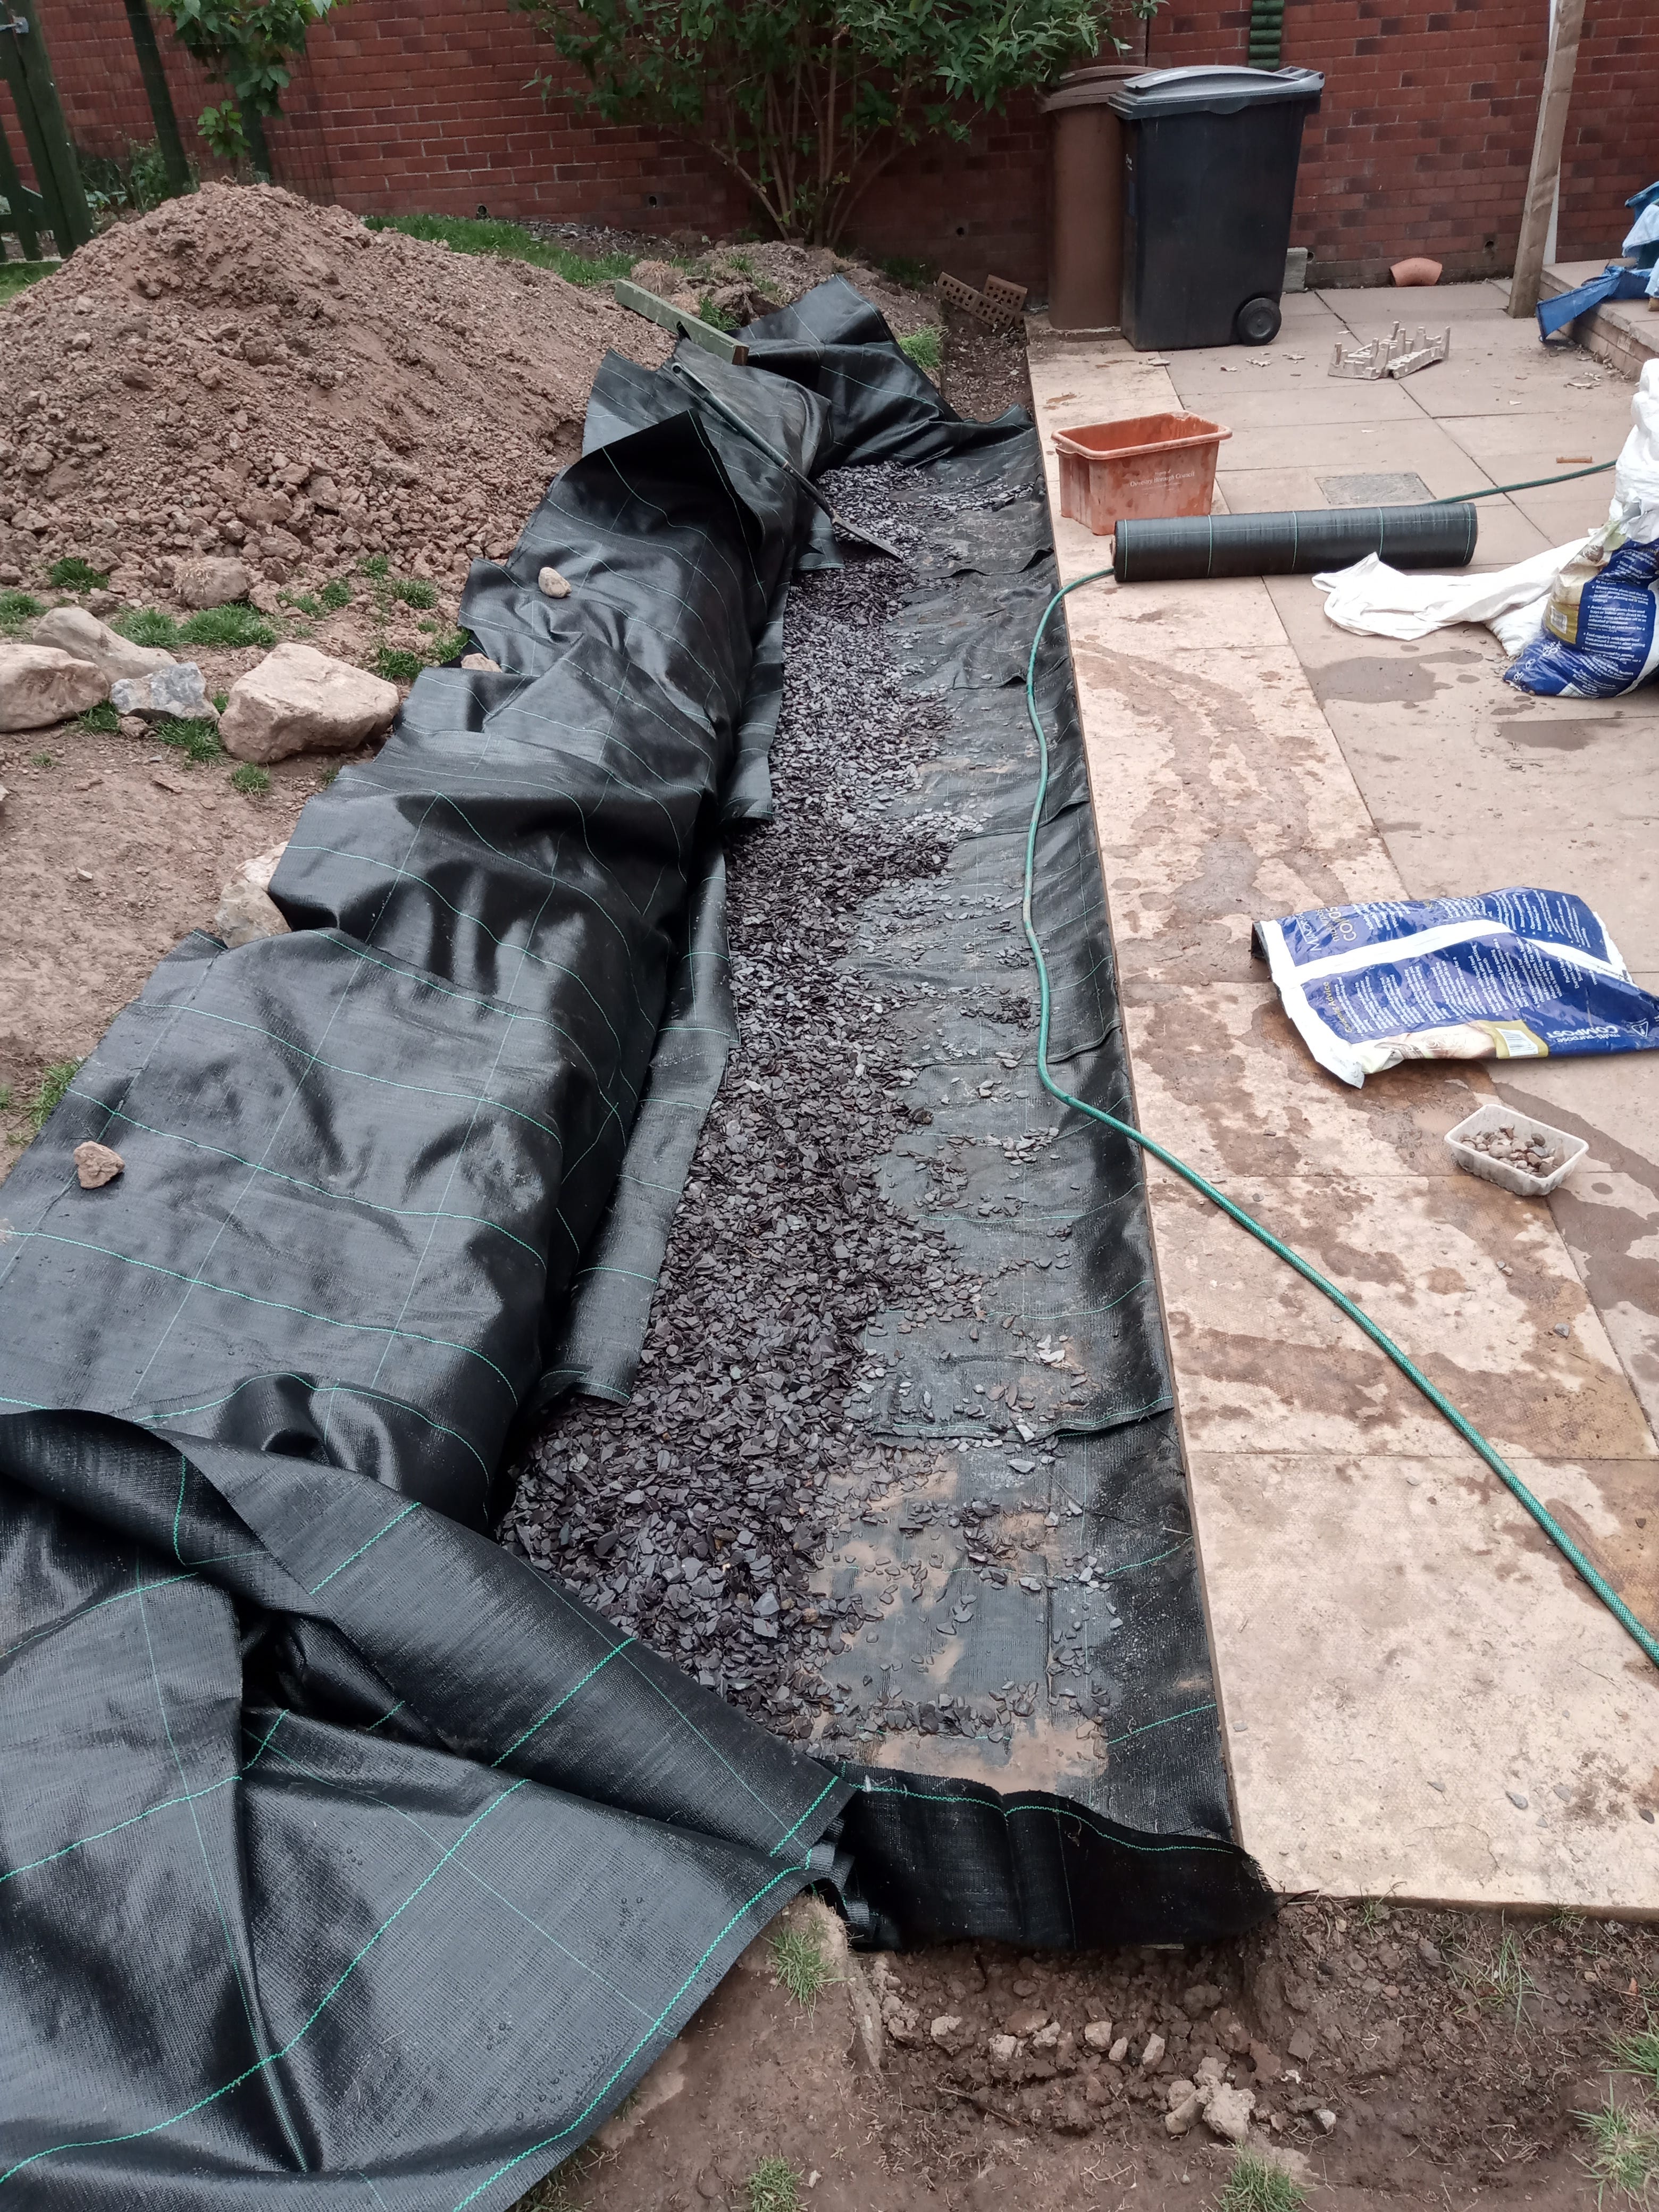
Lining and Filling the Trench
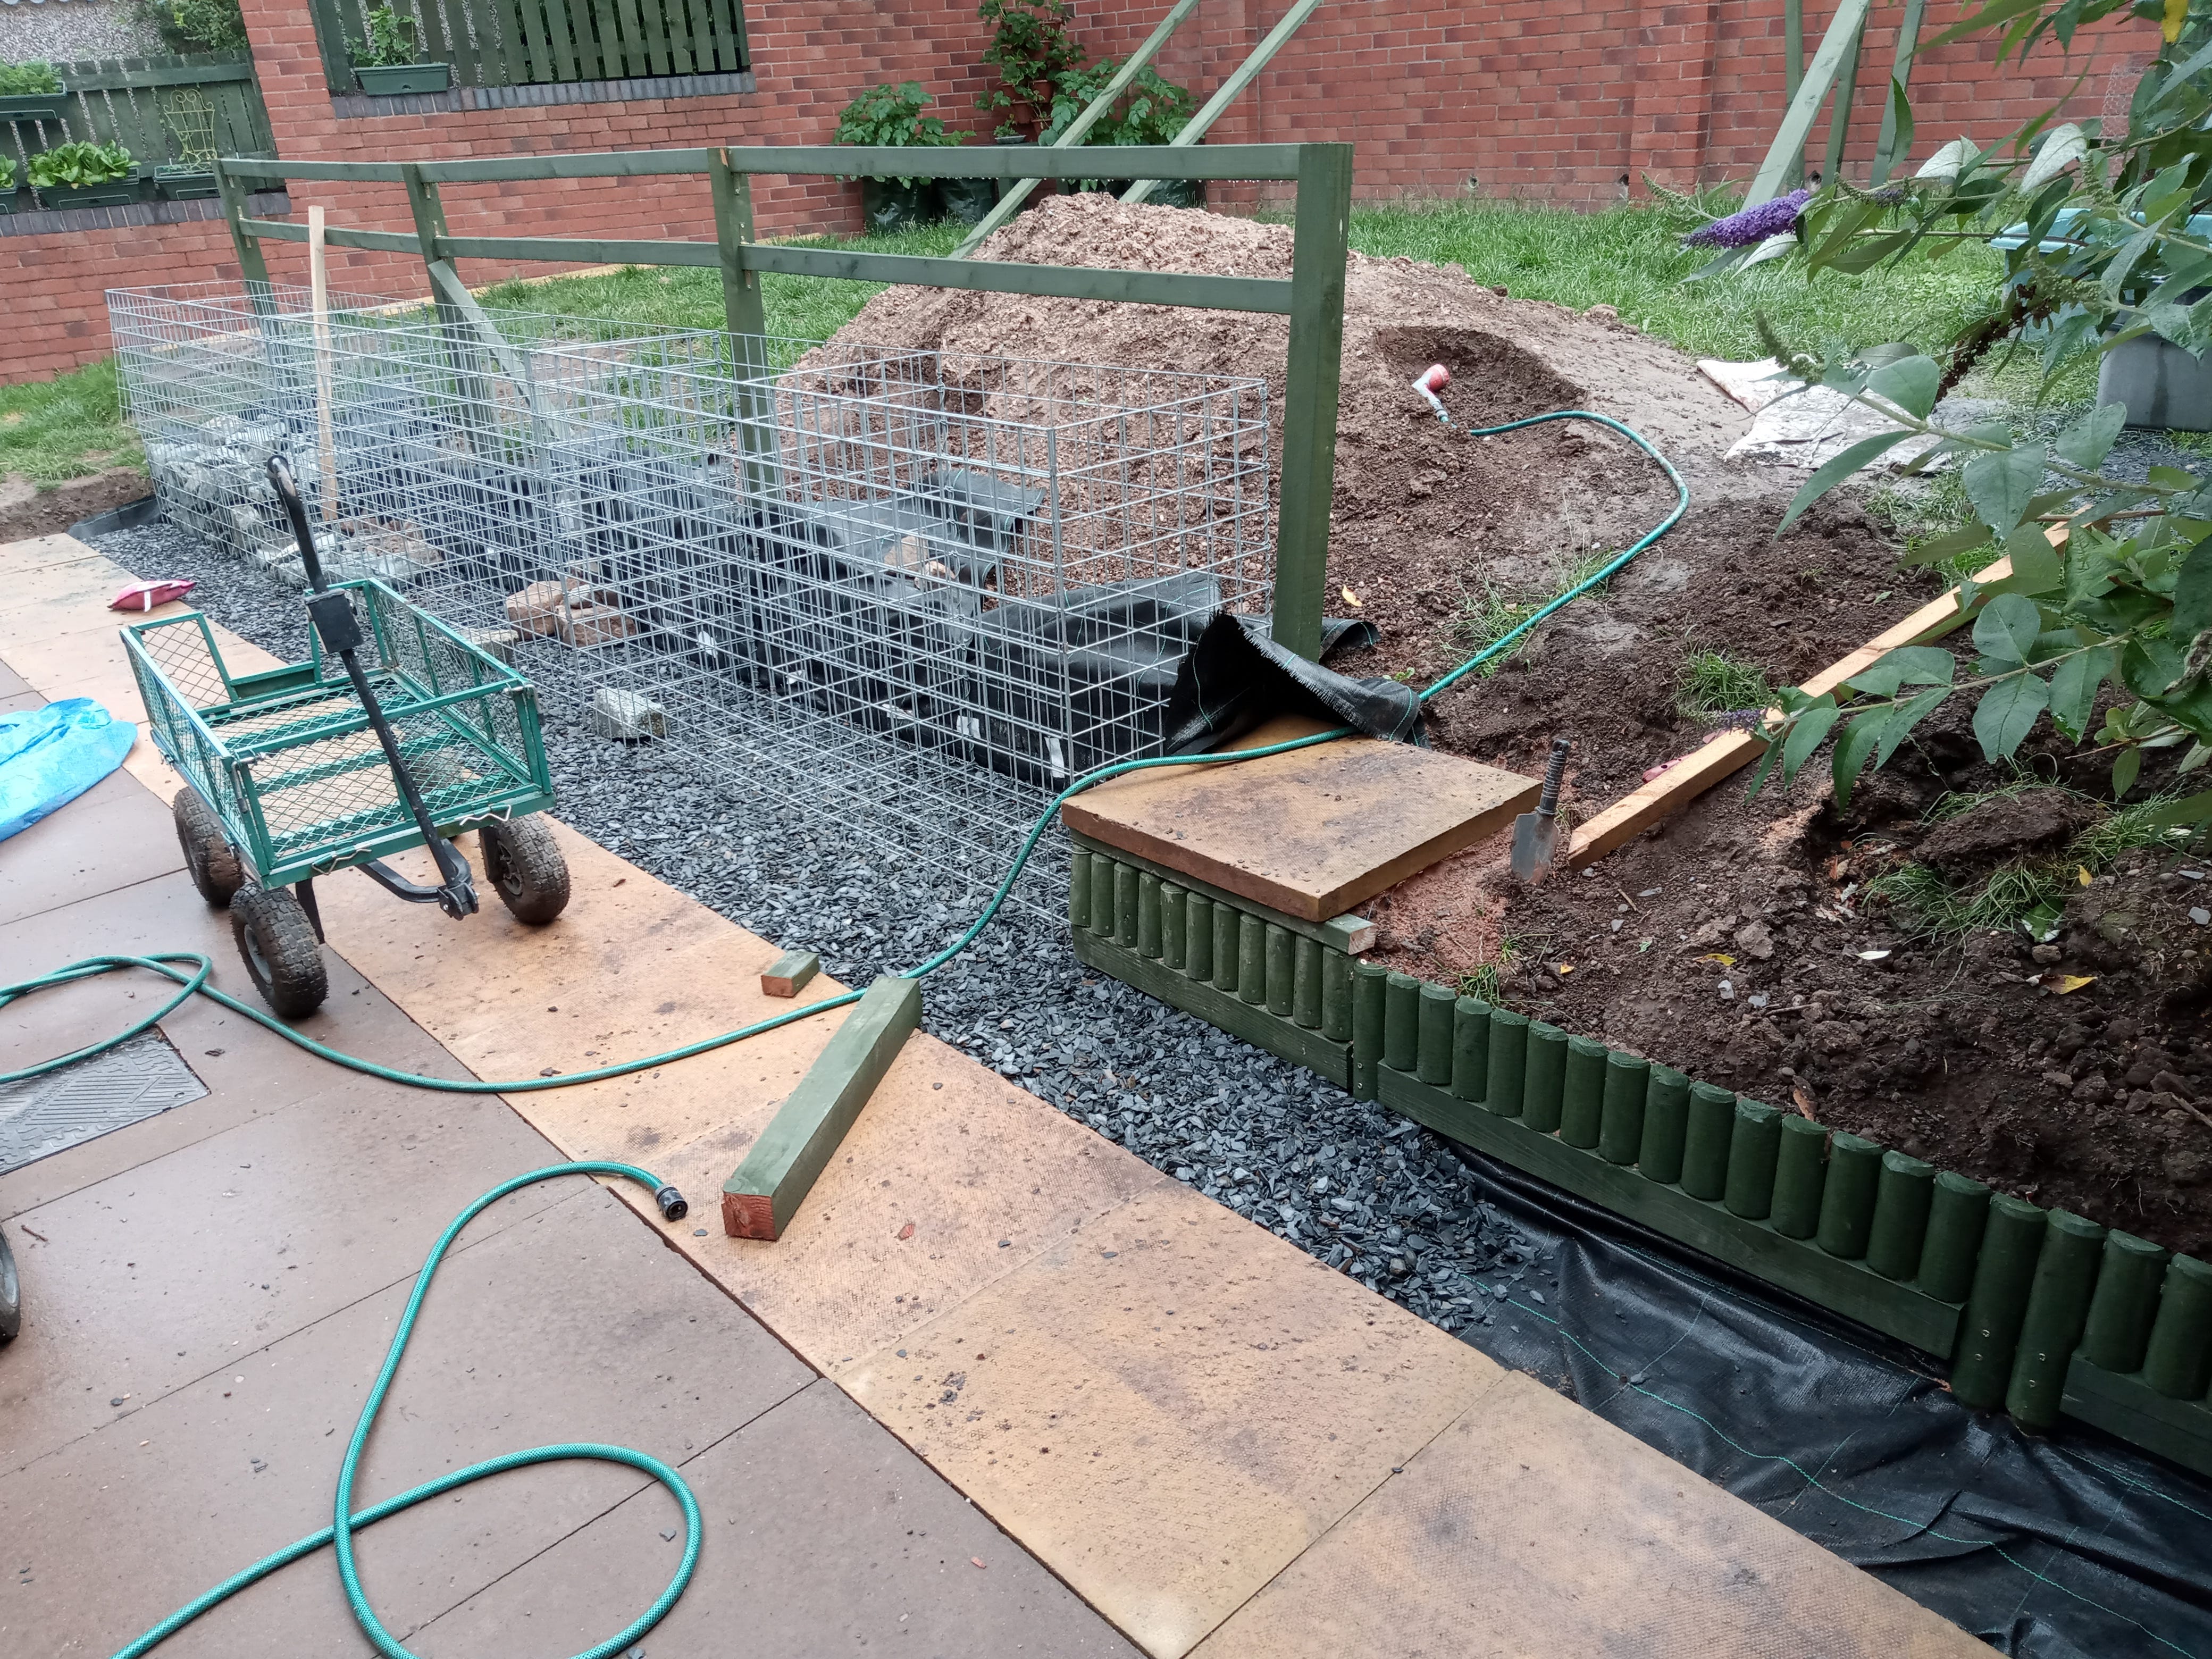
Before assembling our gabion baskets and putting them in the trench, we had to make the trench ready. It needed to be lined with landscape cloth, with enough extra to come up the back above where the ground would reach after it got tilled with added good soil and manure, leveled and laid with new turf. Without landscape cloth, the slate chips and gabion would gradually become mired in mud and the dirt behind the gabion would wash into it.
Then we needed a bed of slate chip where the base of the gabion would be.
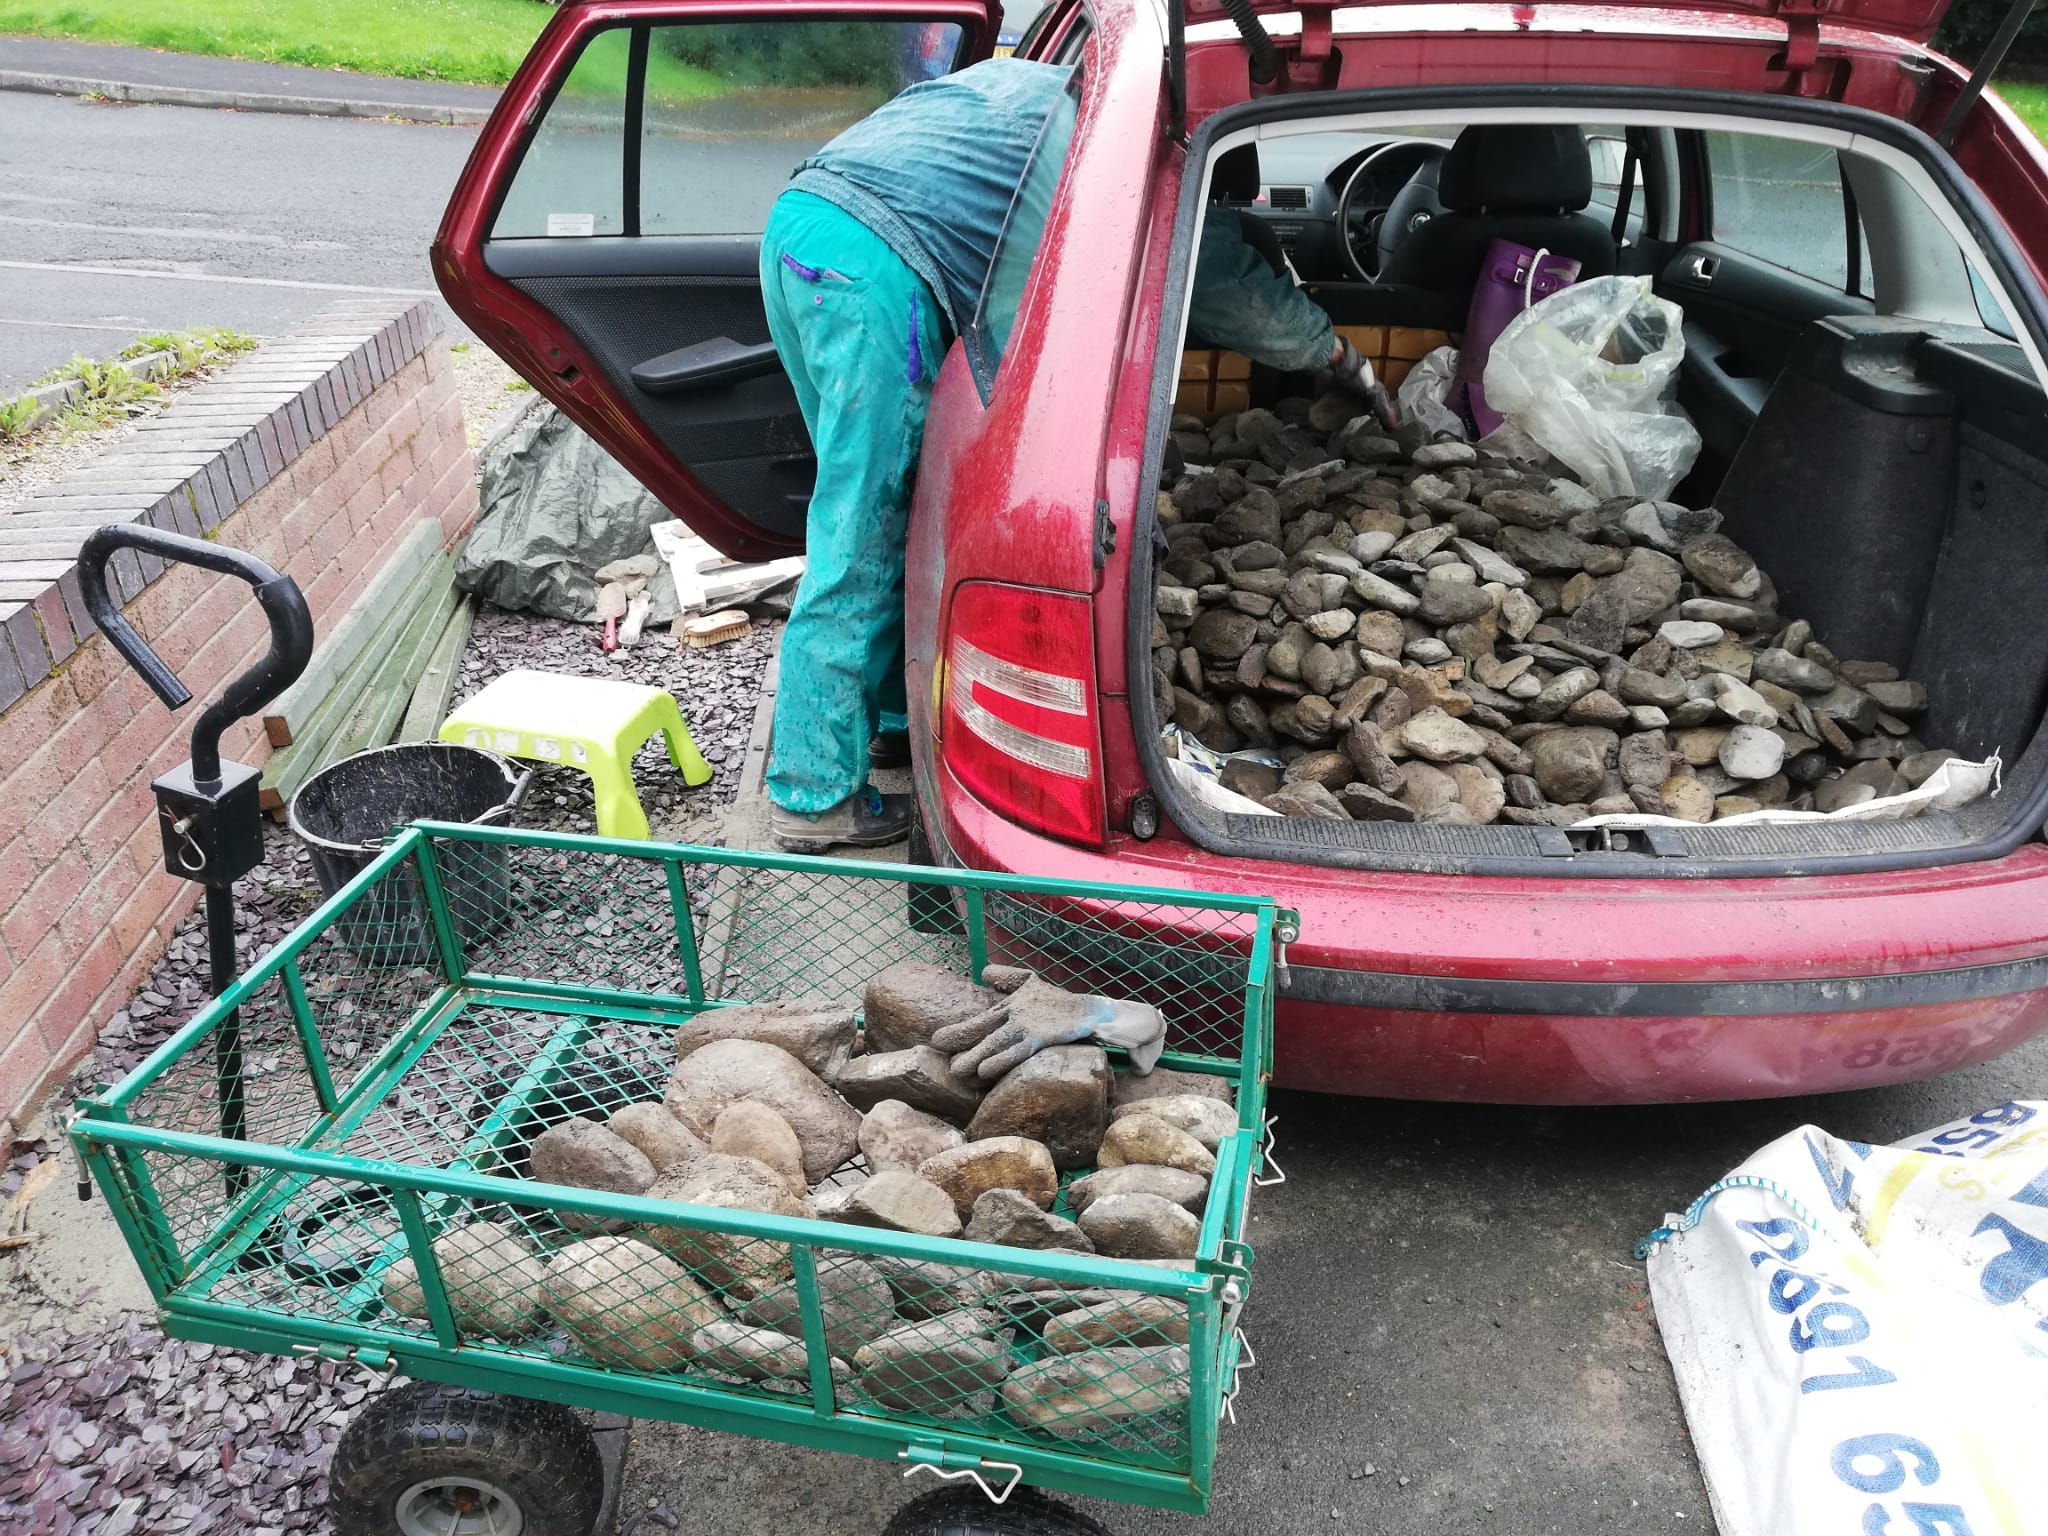
It sounds easy, but the local company we bought from doesn’t wash off slurry from the stone crusher. We had six tons of rocks and slurry on our driveway in huge bags. If we didn’t clean rocks before putting them in place, rain would wash the slurry into our trench and our French drain.
With buckets and the garden hose, I started washing slate chips and putting clean chips in the trench. It was taking too much water and time.
(Photo by Bonnie D. Huval, copyright 2020)
Neighbor Sue came to the rescue. She lent us a sieve. I came up with a system for taking three buckets of slate chips at a time to the back garden on a dolly, washing them with less water than before, and spreading them in the trench.
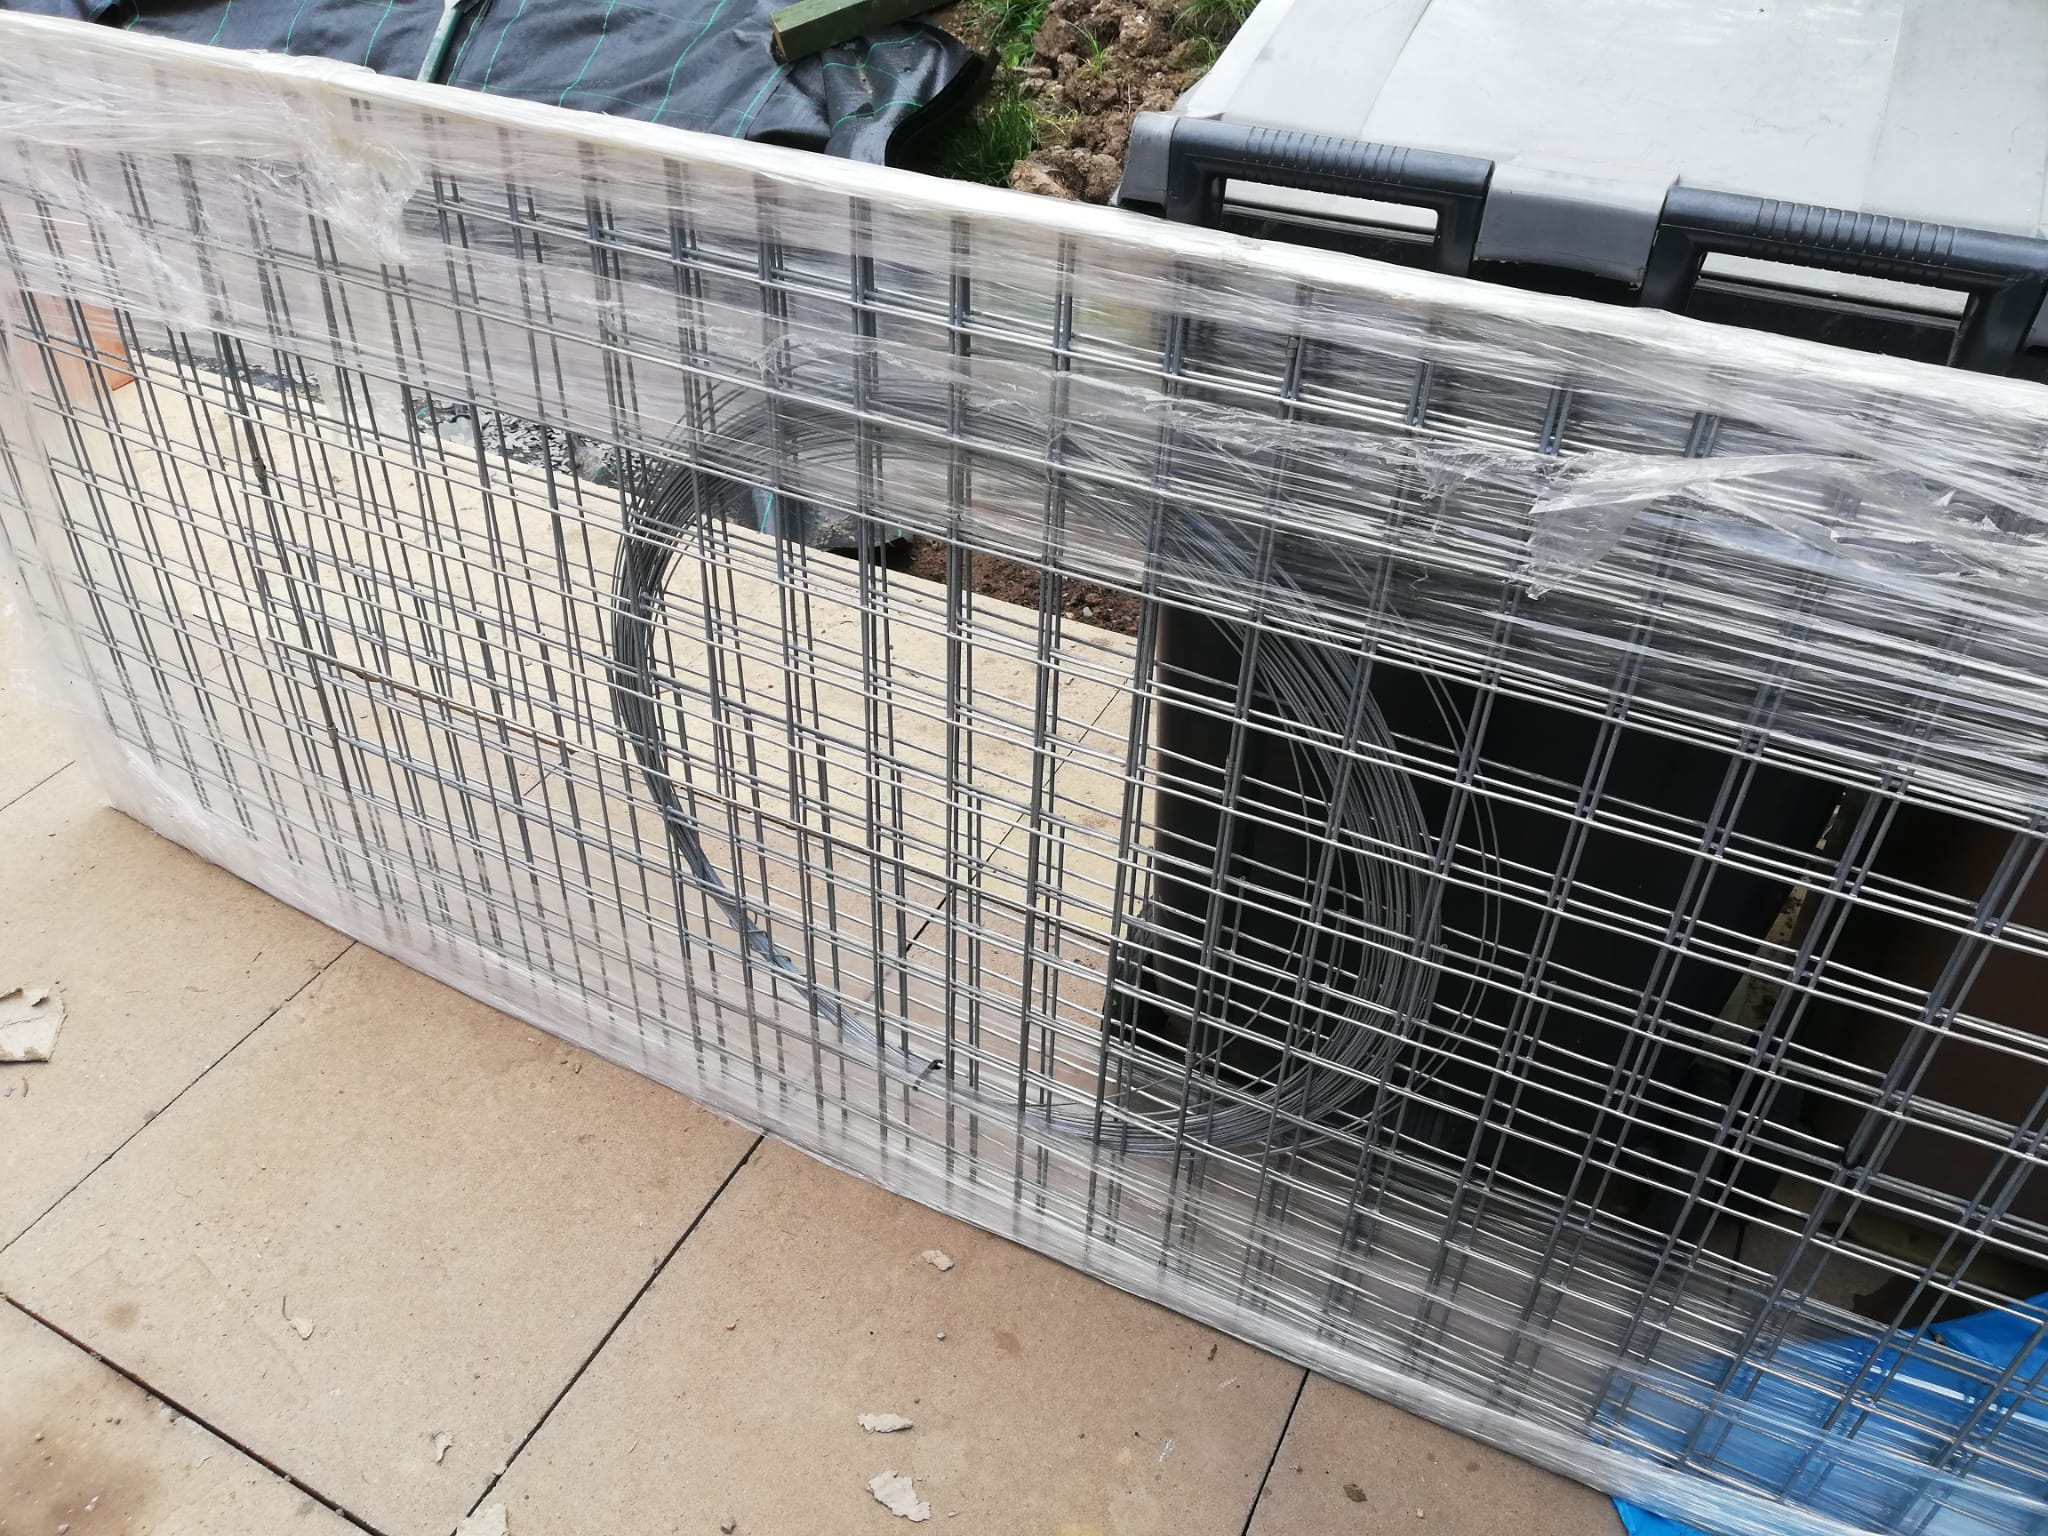
We brought the flat packed gabion baskets out to the patio.
(Photo by V, copyright 2020)
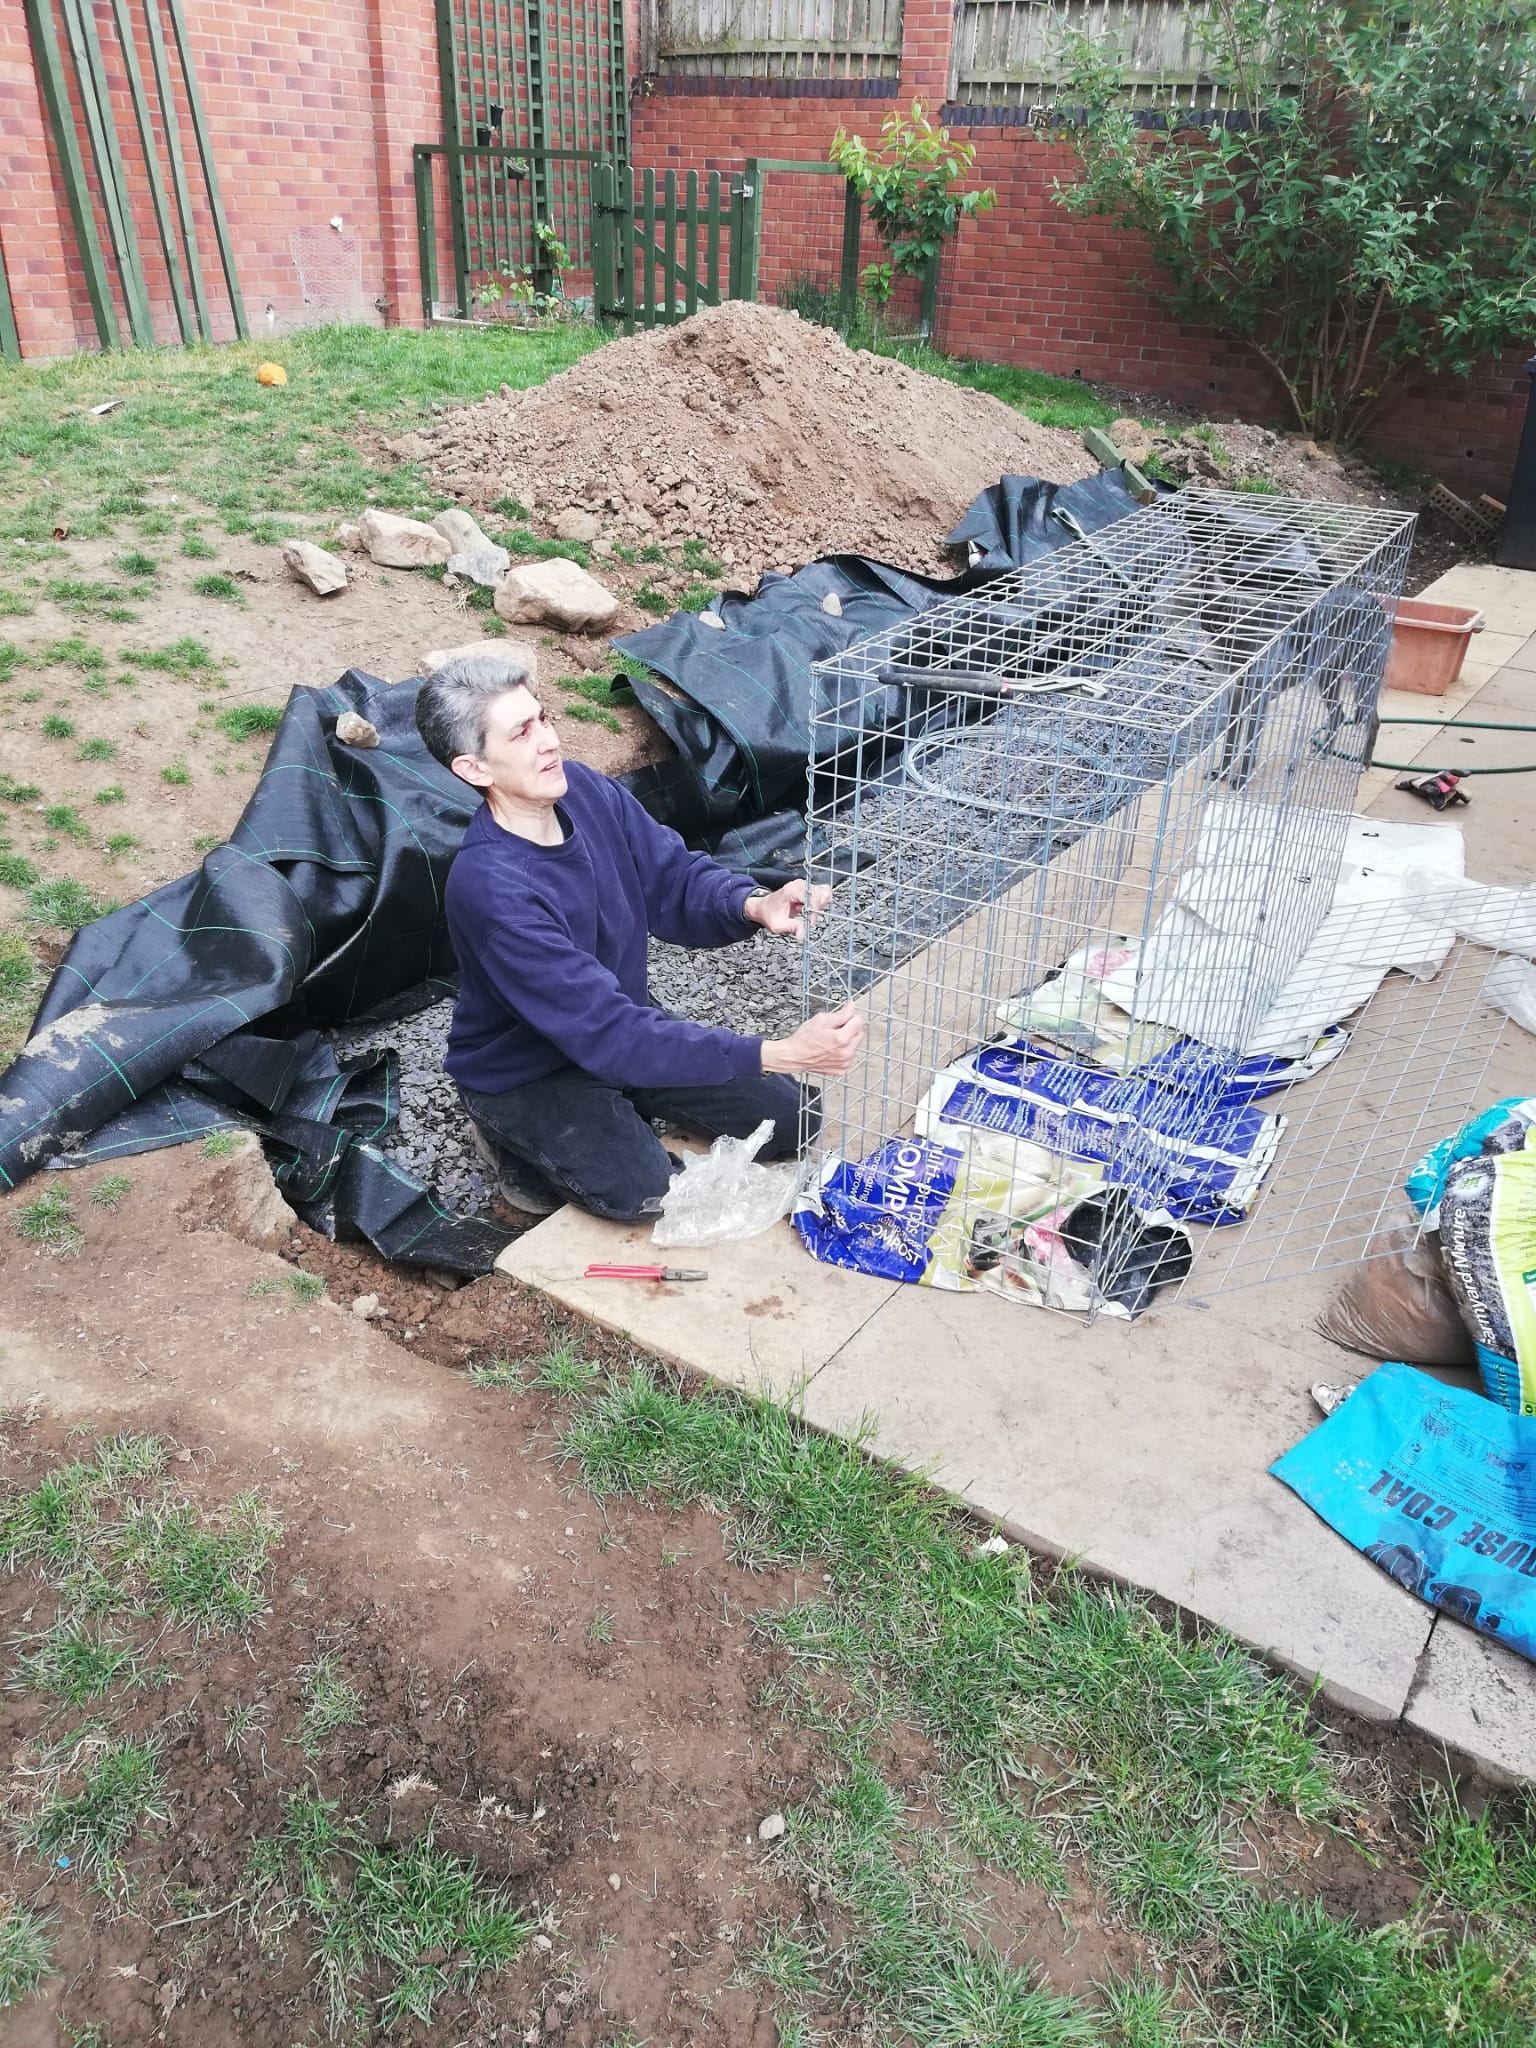
Gabion Basket Assembly and Placement
To protect the coating on the baskets, I spread empty bags on the patio so I could lace the gabion baskets there without harm. If you are curious about how that should be done, click here. Some videos online also show how to do it. The one I’ve linked to gets to lacing technique around the 10 minute mark. Lacing will last longer than helical springs and holds the baskets together more tightly.
There are a few lacing patterns. If you zoom in, you can see the one I chose.
(Photo by V, copyright 2020)
In real life, it was much more difficult than in the videos. Remember, we got heavy duty baskets with heavy duty wire. It was thick. The videos used wire of a more normal thickness, so they were much easier to manipulate and pull tight. I needed to do it without damaging the coating on the wire, too. Our wire fought me. Sometimes I had to use pliers padded with multiple layers of cloth to cajole the wire into doing what I needed it to do. My hands got sore.
Eventually the baskets were assembled and lashed together. We moved the whole thing into the trench on top of its bed of slate chips and eased it into position. To serve as a retaining wall, it should not be vertical. It leans back about 6 degrees. The lids remained open until we filled the baskets.
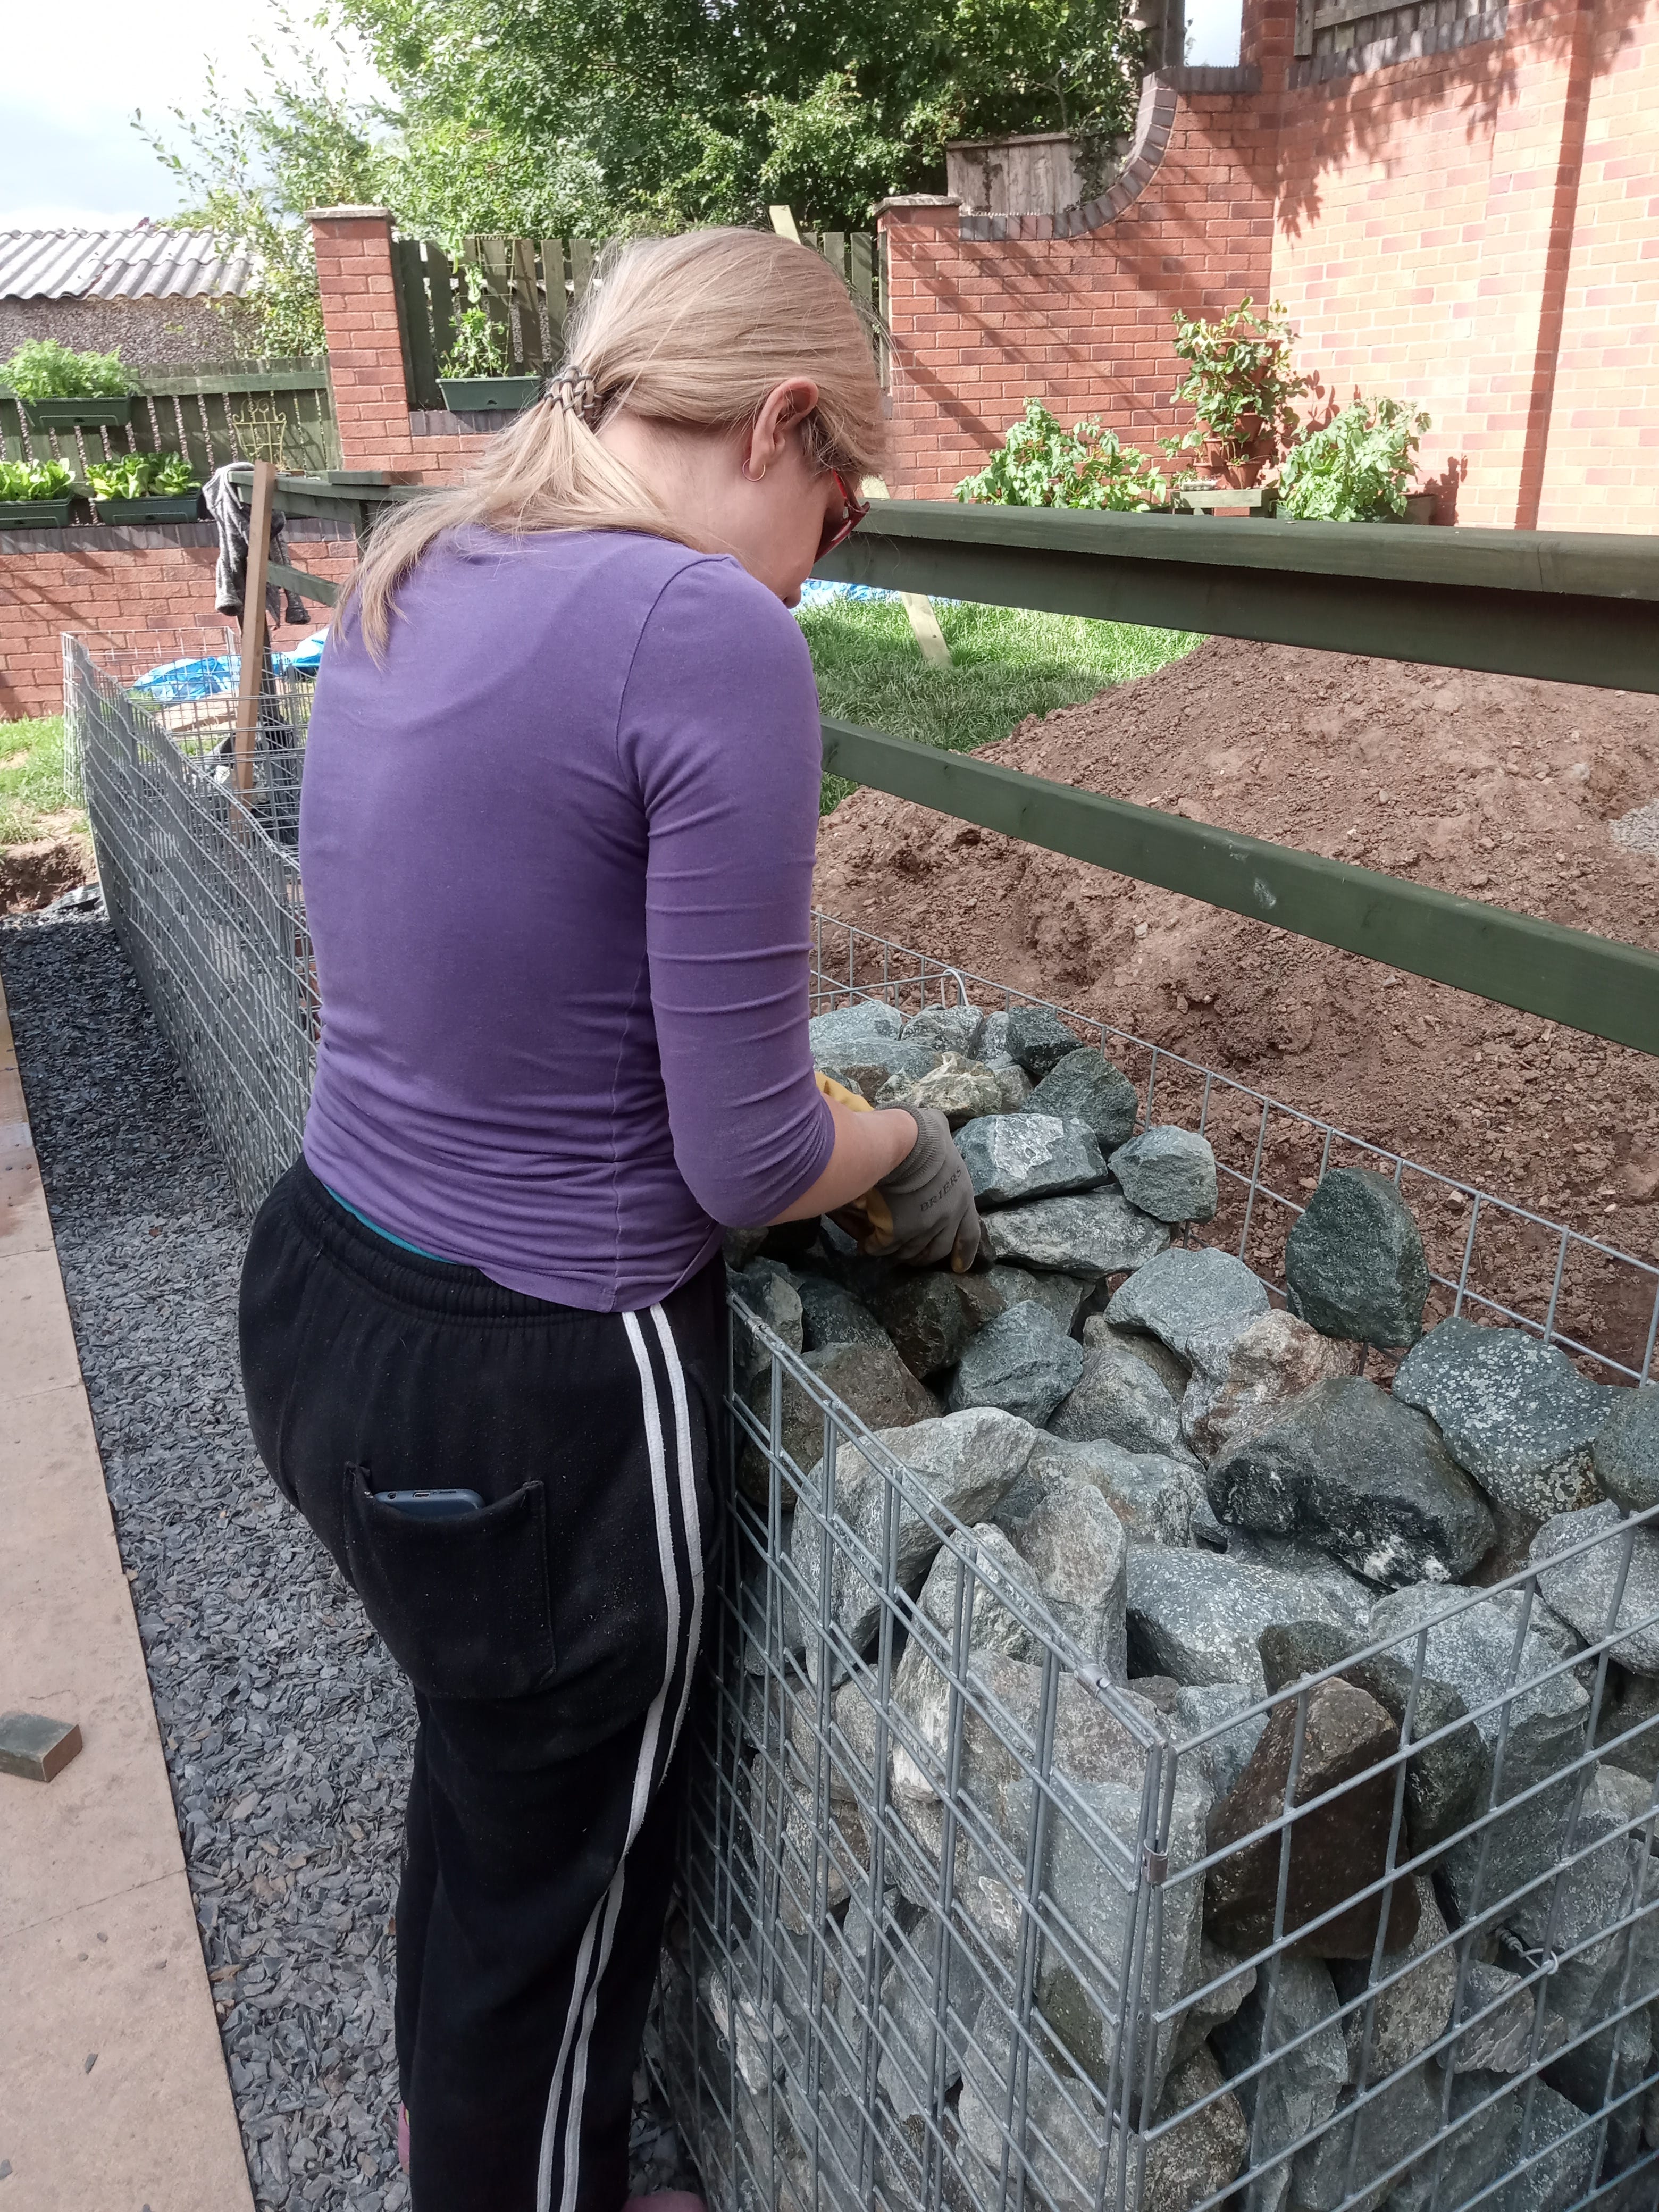
Before we started filling, I added bracing wires across each basket to keep the sides from bulging as we added stones. They are necessary, but complicate the placement of rocks inside.
(Photo by Bonnie D. Huval, copyright 2020)
Cleaning, Toting and Placing Rocks
Rubble goes in at the bottom and back where it will be out of sight.
(Photo by V, copyright 2020)
Every gabion stone had to be brushed off, then toted to the end of the patio where we washed off the rest of the slurry before putting it into the gabion. Stones should not be tossed in. They should be carefully placed, packed in, fitted so the basket is as tightly filled as possible. It’s a three dimensional game of Tetris.

(Photo by V, copyright 2020)
The neighbors at the retaining wall to the side of us lent us their little green wagon made of metal mesh, as you can see in some photos. It was much better than our dolly and buckets. We could stack the wagon full, pull it to the patio, hose down the rocks right there in the wagon, and transfer them directly into the gabion.
We were both processing rocks with every spare moment. We were exhausted. It felt like we would never finish. Three friends each helped for half a day or so. Aside from their help, we built the whole thing ourselves.
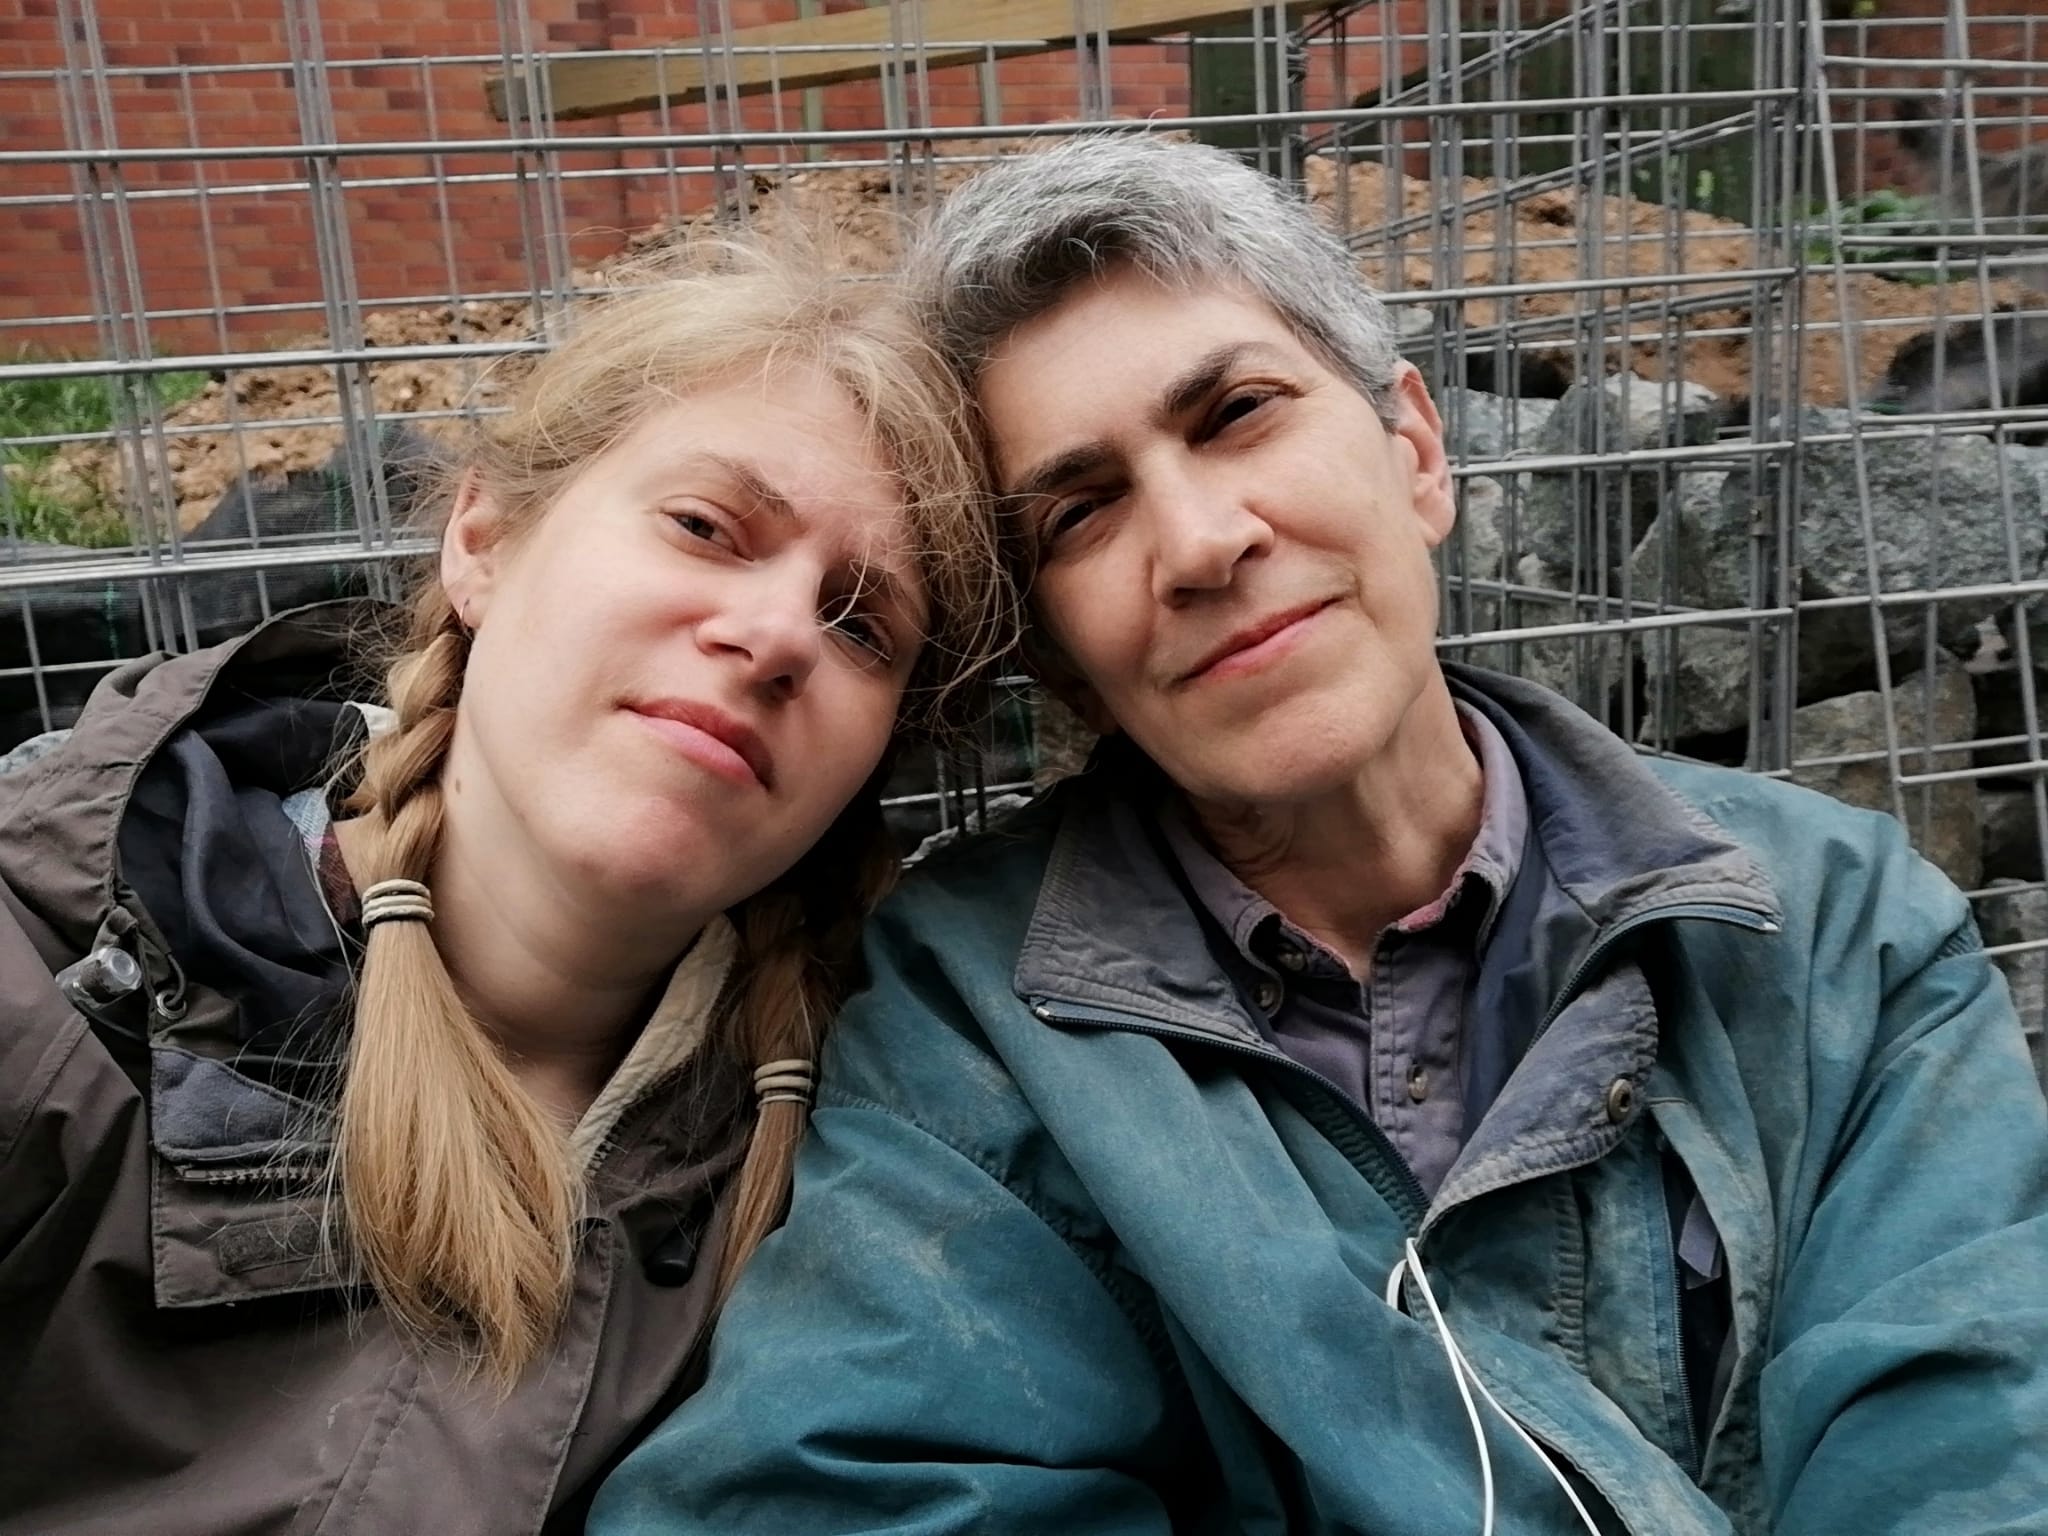

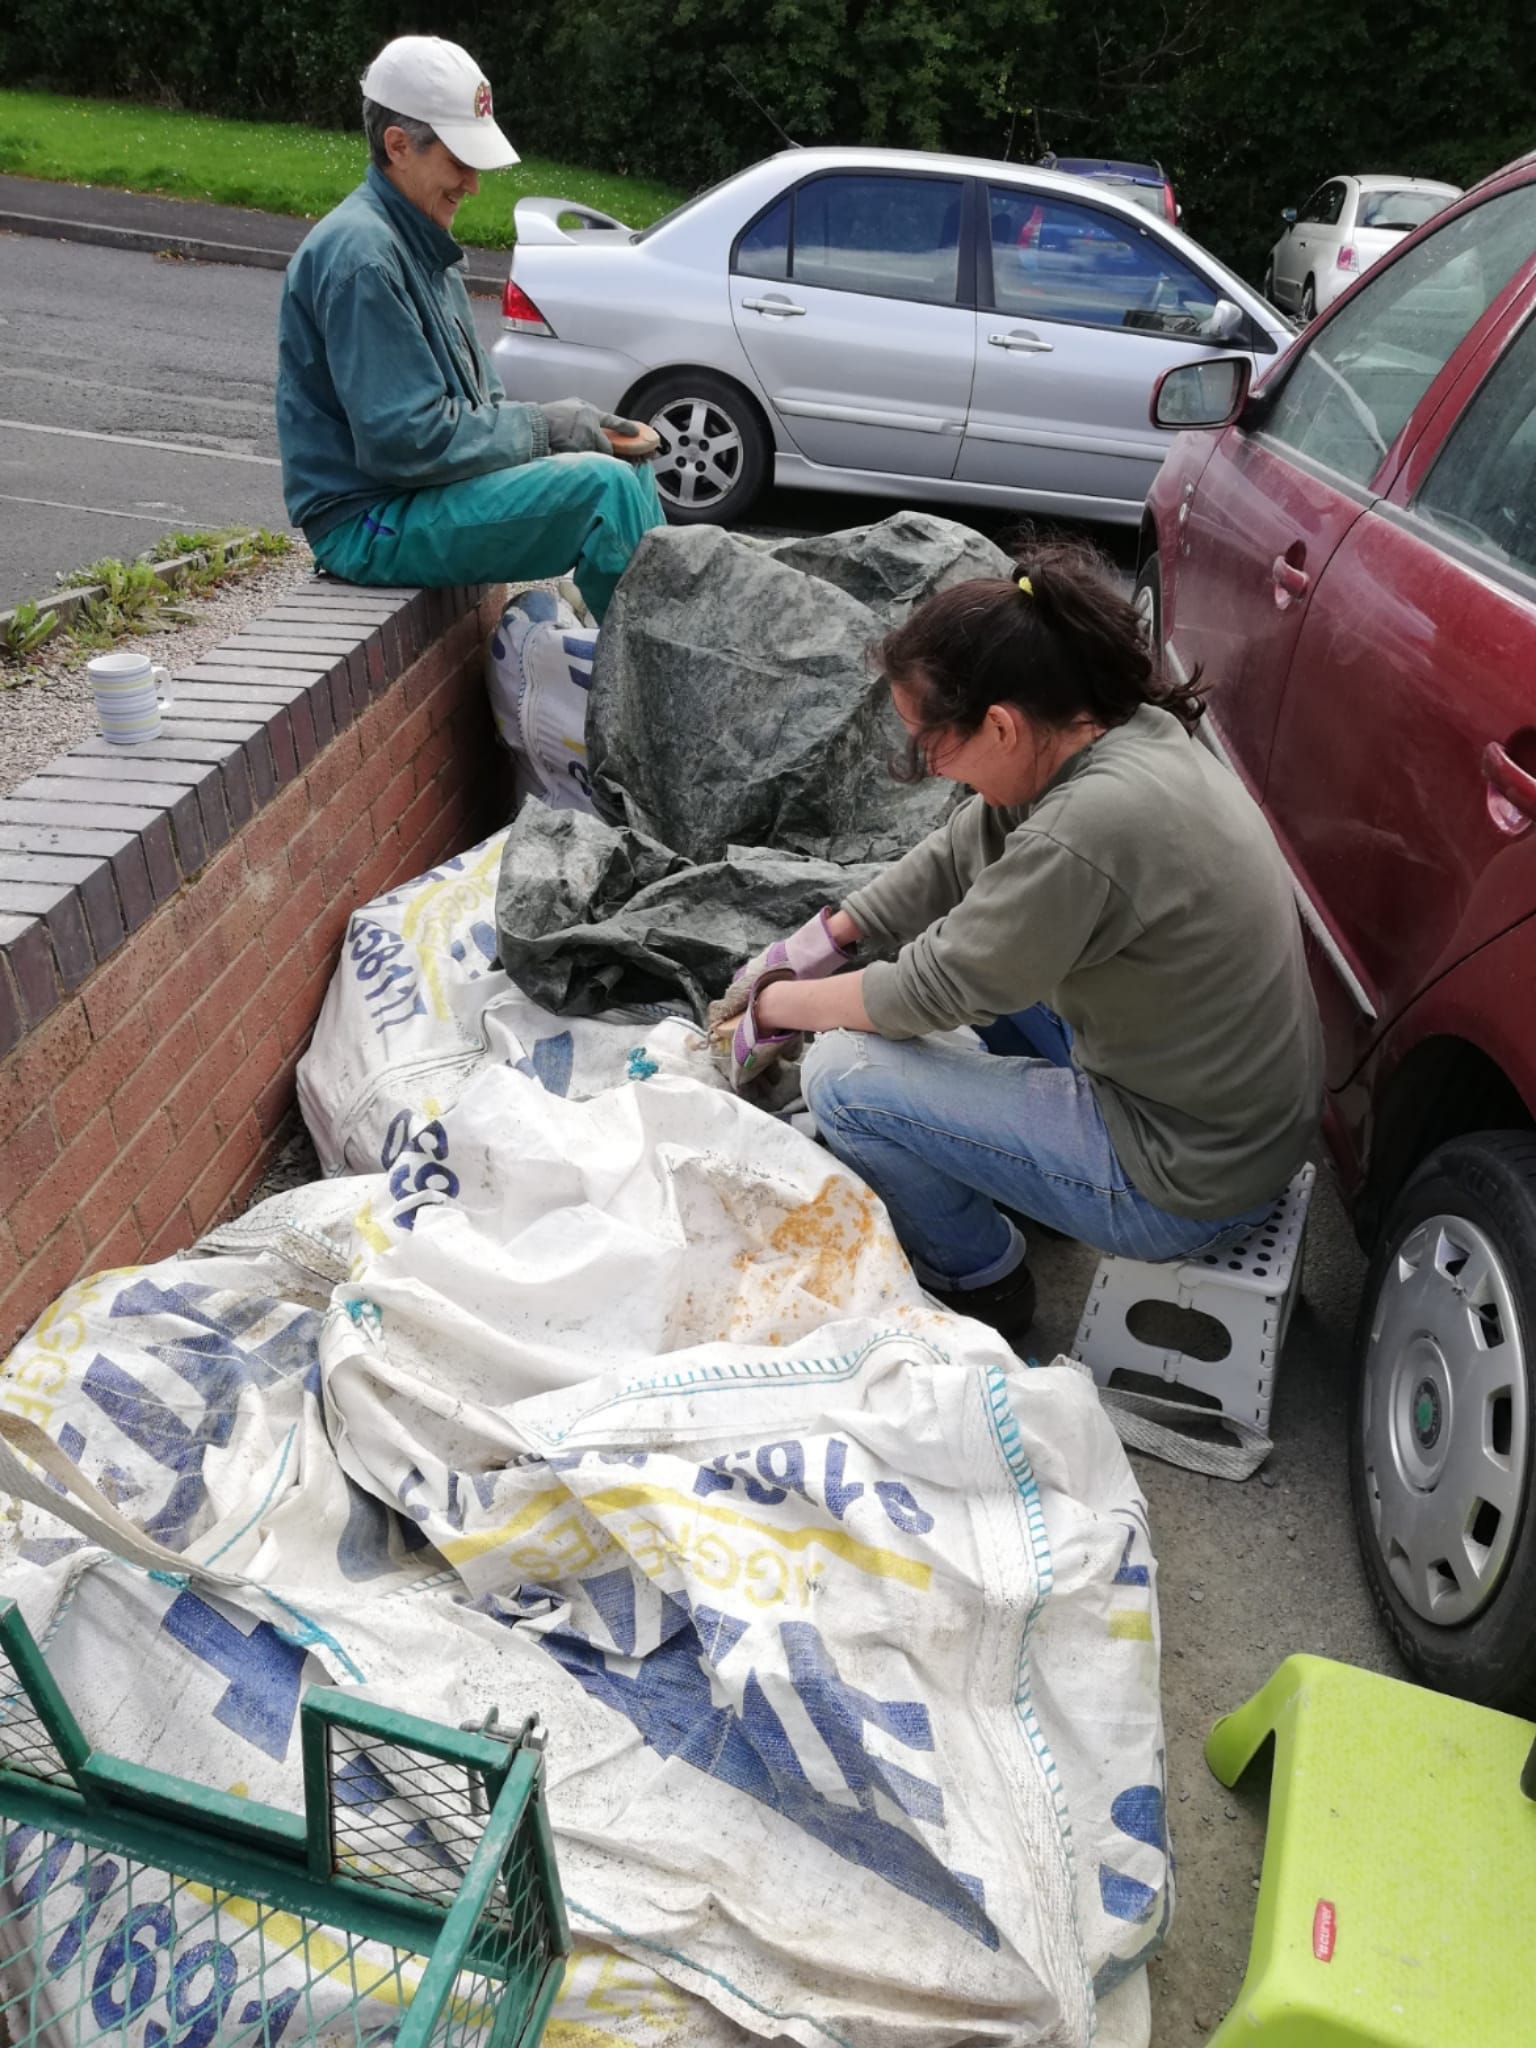
(Photos by V, copyright 2020. Us, tired. Teri & Becca helping to clean gabion stones.)
(Photo by Bonnie D. Huval, copyright 2020. V placing some of the last stones in one basket.)
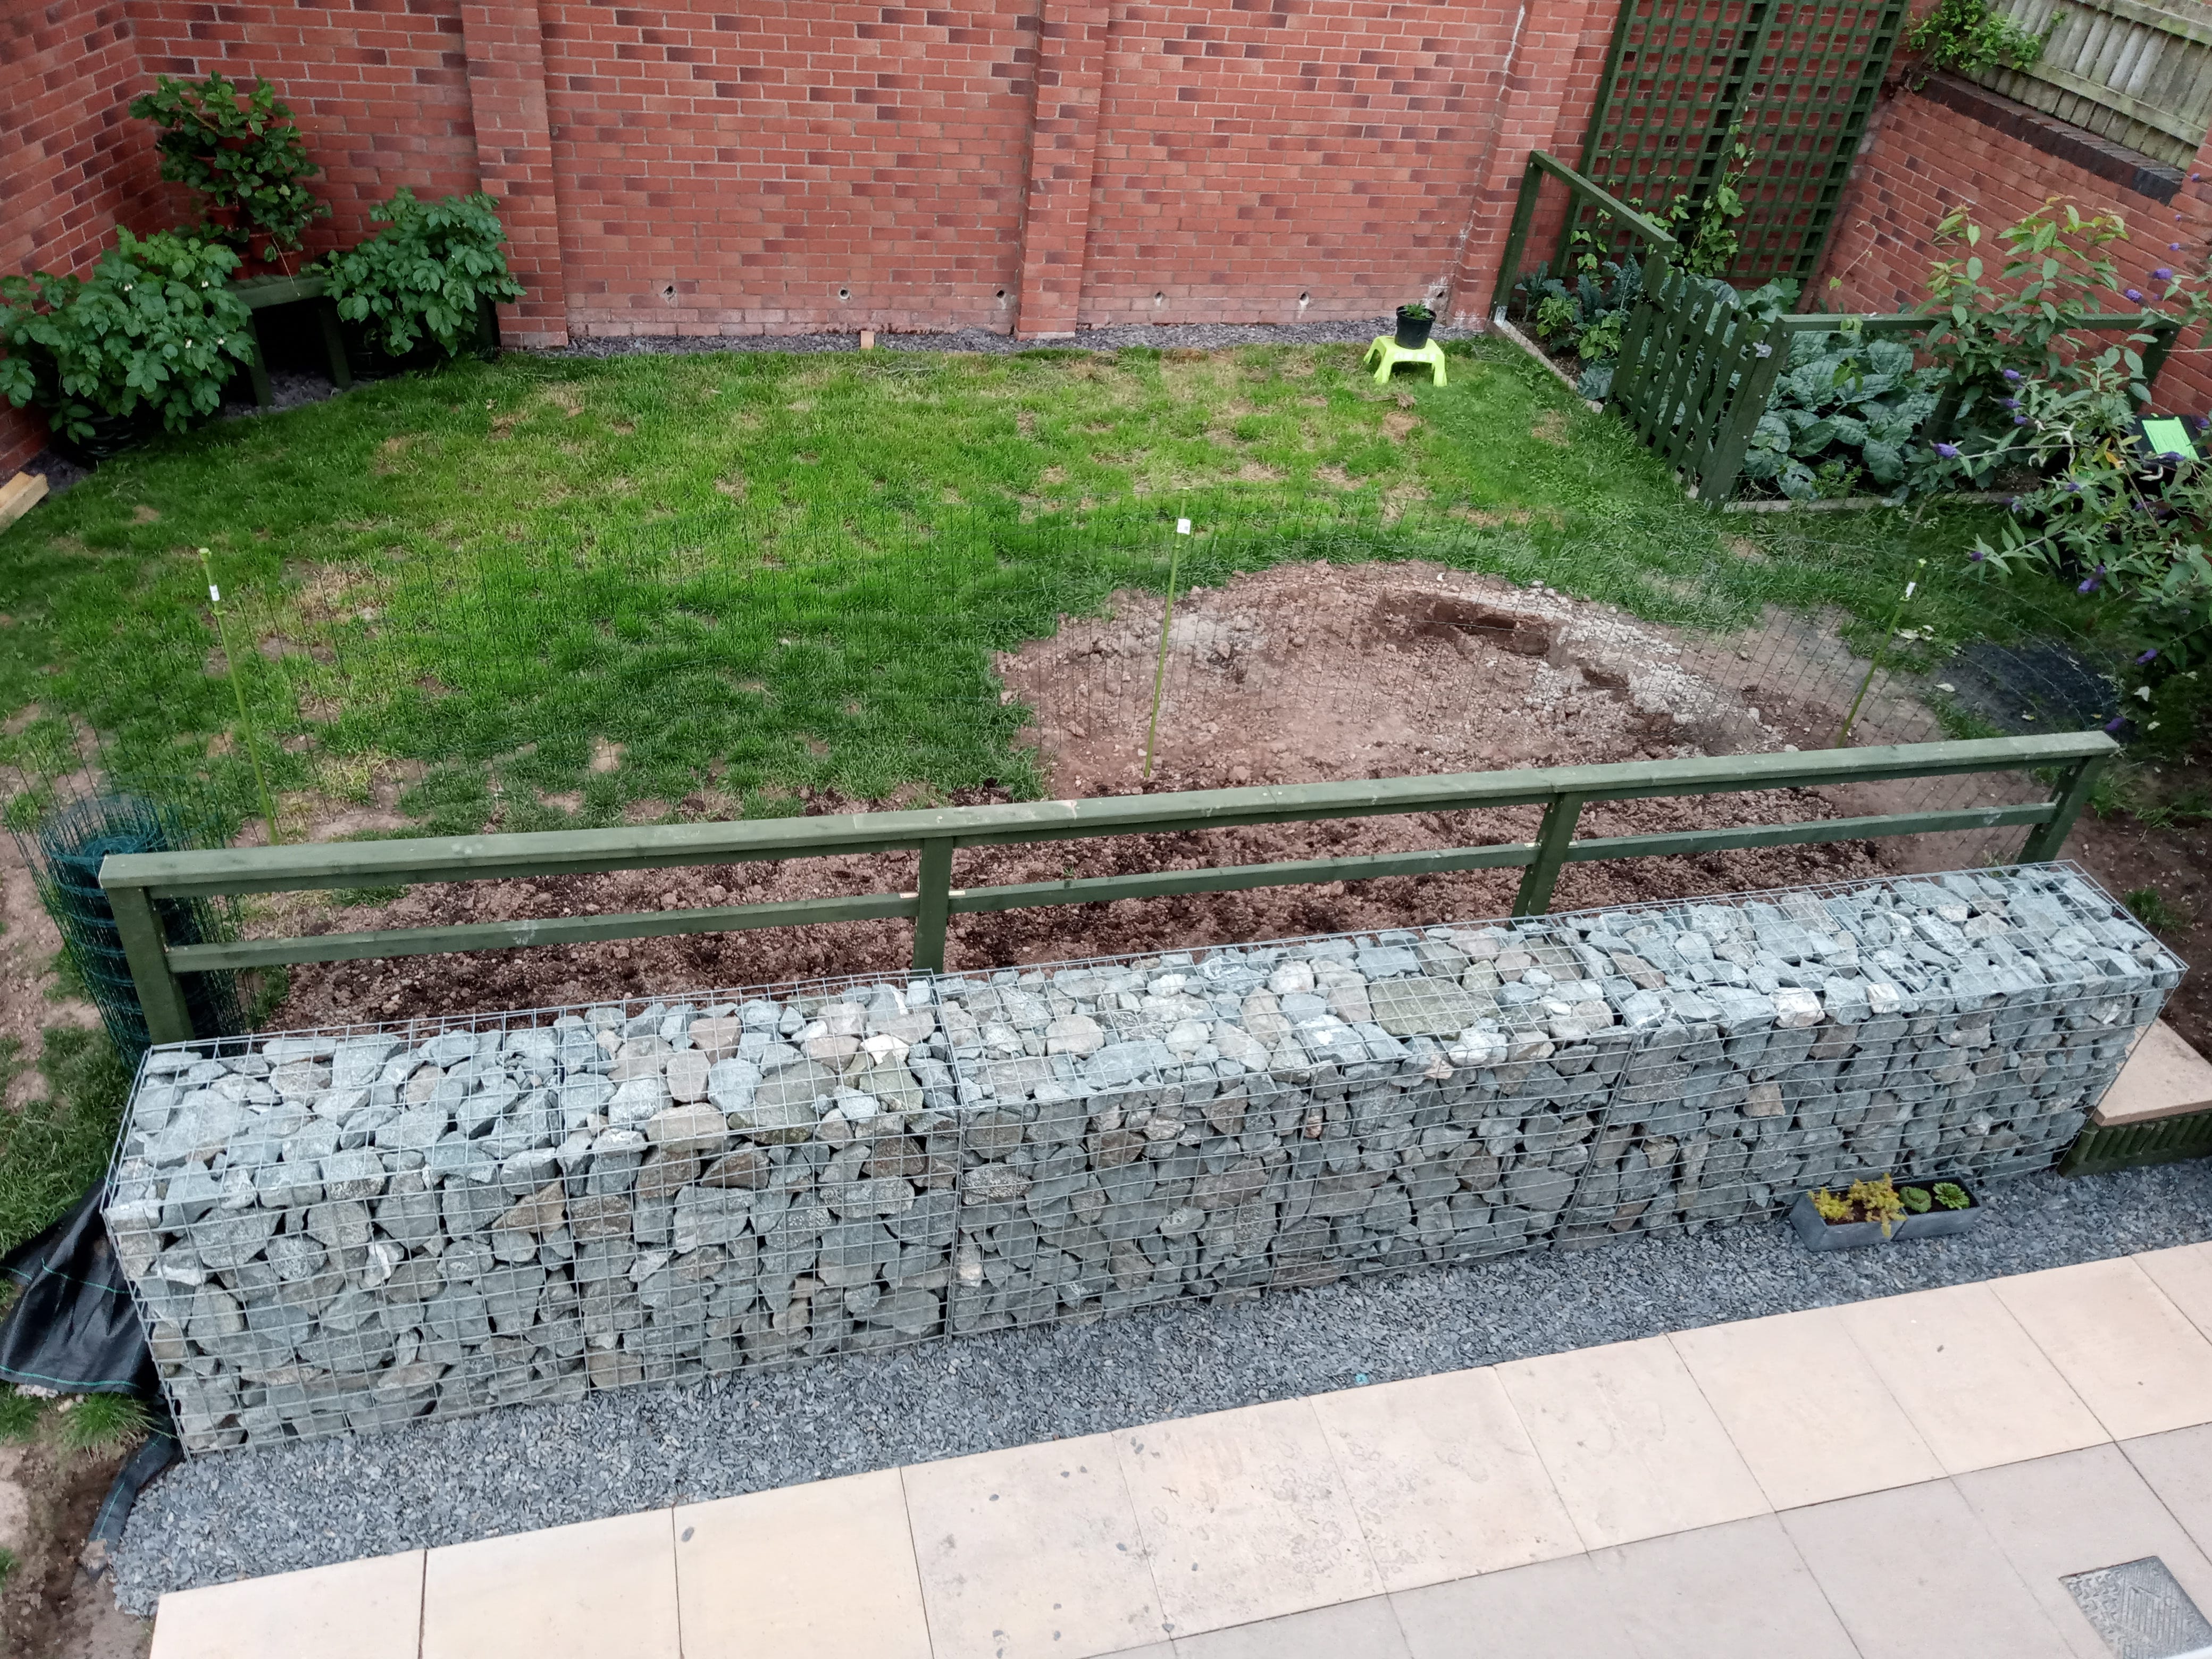
Fence Behind Gabion Wall
The fence behind the gabion wall is nothing special. I built it on the patio while V was at her job, then lifted it as one piece onto the gabion and tilted it into its post holes. Doing this alone, I didn’t quite get everything perfectly level. Each time I lifted a post that was a little too low, it wouldn’t stay where I put it and sank down again. When we had a team of two guys working in the garden later, part of the job was supposed to be helping me fix that, but they didn’t. It’s imperfect but functional.
Despite not being perfect, the fence has been a better idea than we imagined. Small children like to climb up on the gabion wall, run to the end and jump off. They naturally stay near the fence as they run. Small children who find our dogs overwhelming at first use the top of the gabion wall as a viewing platform. The dogs can stand on hind legs to give them a sniff or a lick, but can’t knock them over. The dogs can play wildly right in front of the kids, who have a front row view while feeling perfectly safe.
Closing the Lid
By the time we finished packing the gabion baskets, I realized lacing the lids closed would be a daunting challenge. The lacing I had done already happened when the baskets were empty. Now they were full of rocks which would get in my way. The fence would also be in my way.
When the baskets arrived as flat packs, the lids were attached to one side with special clips. The lids weren’t under as much stress as the bottom or sides, so clips would suffice. I ordered more clips and a special crimping tool online. I used the clips to close the gabion lids. They were much easier, quicker and neater than wire lacing.
(Photo by Bonnie D. Huval, copyright 2020)
For a long time the gabion wall itself looked more or less like this, with the addition of wooden end caps. We put scrap boards on top for small children who wanted to be up there, but we couldn’t get what I wanted for a top. In April 2021, the only company I had found that offered what I wanted began to ship to our part of the country again. We got decking boards 6 meters long. I attached them to each other with metal strapping underneath to make a top for the gabion wall. When small children run along it, there’s no seam across it to trip on. The only seams are lengthwise.
A few small succulents have begun to grow in nooks and crannies. Heaven only knows what’s living inside. We hope plenty of wildlife is in there now. We wouldn’t want a gabion wall in east Texas, which is home to every species of poisonous snake and spider native to North America. The only venomous snake in Great Britain is the adder, which is rare to non-existent in our part of the country.
Every so often V changes the way the gabion wall is dressed up. Colored solar powered LED fairy lights are along the fence. Solar powered lights hang on the front. Potted plants and pewter-colored small planters sit in front.
Discovering What Was Missing
Small gatherings outdoors with social distancing were allowed by the time we closed the lids on our gabion baskets. Knit Club came over to help us celebrate by meeting on the patio. I don’t knit or crochet. V does. I’m sort of a mascot. In mid-July, it’s usually chilly at night but not freezing, so meeting outdoors was possible.
Naturally, as soon as they arrived, it began to rain.
We strung up a big tarpaulin over the patio and carried on anyway. It was a wonderful evening.
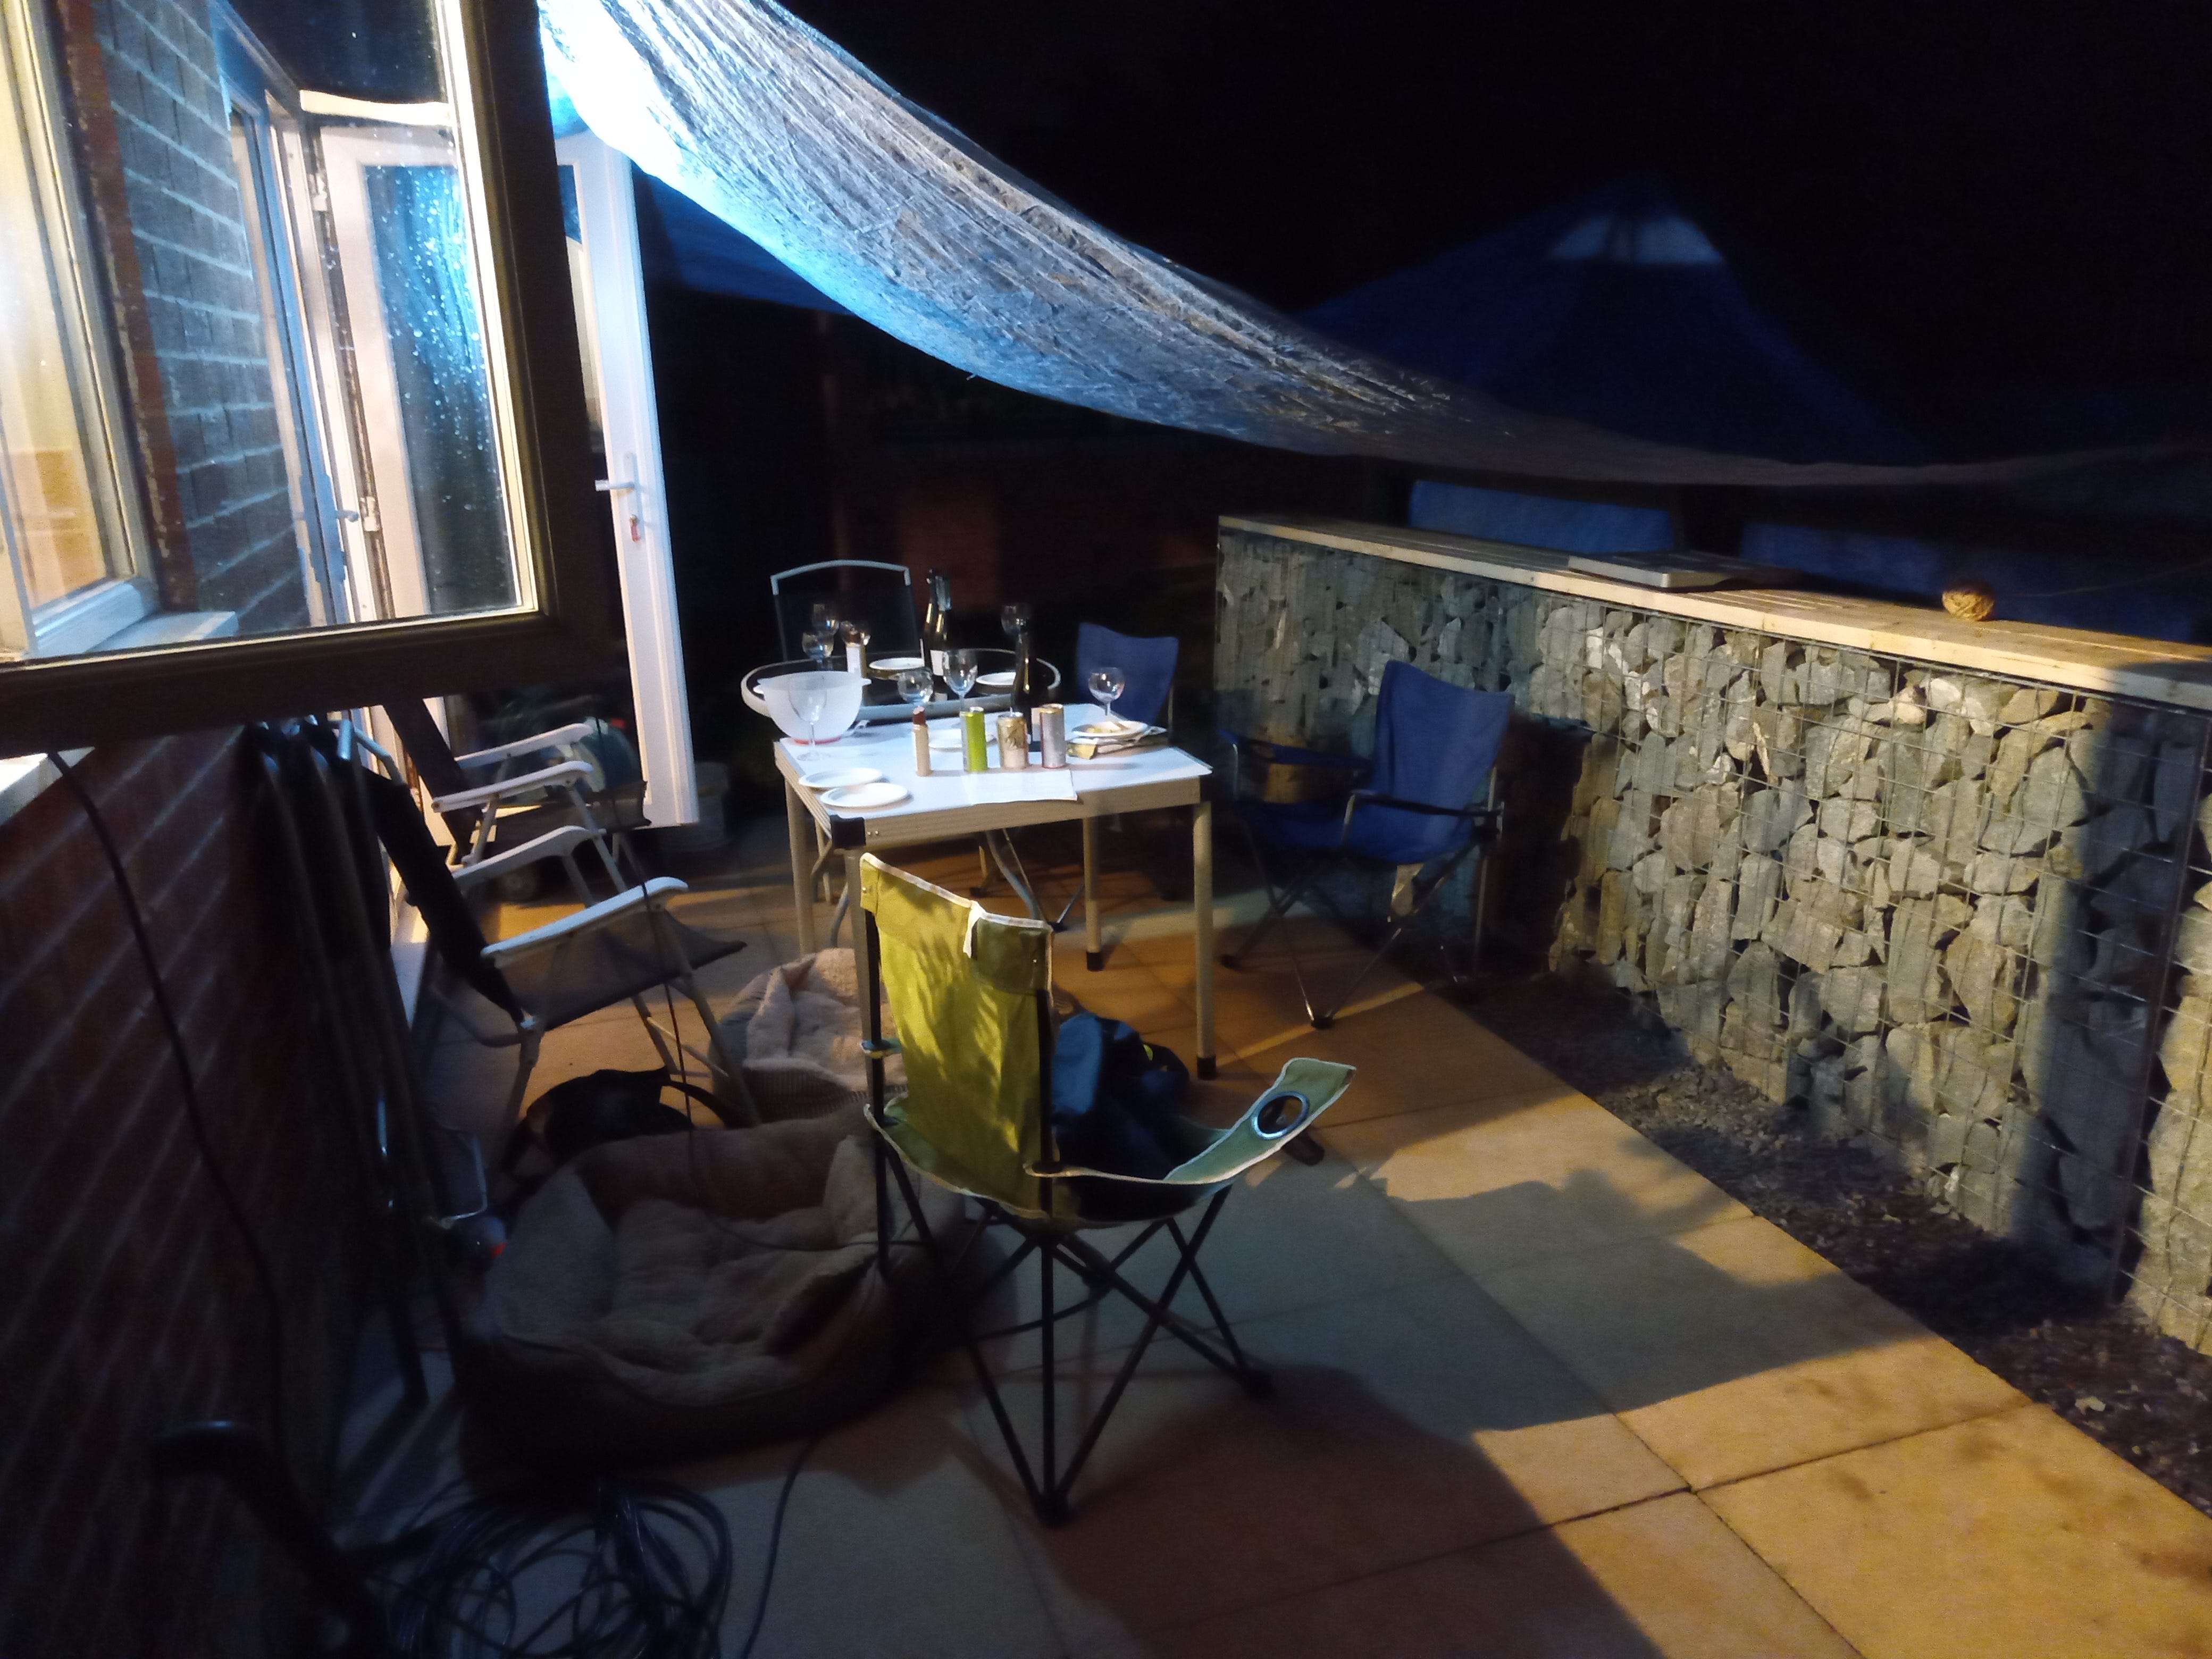
(Photo by Bonnie D. Huval, copyright 2020)
It was a revelation.
The gabion wall made the patio feel like an outdoor room, yet a breeze swept it all the time. Being able to put it under cover made it usable as an outdoor room even in the rain.
We didn’t want a roof. That would make the kitchen and dining room dark all the time, and it would interfere with the morning sun that we enjoy there. But if we could put the patio under cover when the weather demanded, we could make more use of it.
We got a retractable awning. V’s parents came over and put it up with our help. V’s dad has tools we don’t have and putting it up took the muscle of all four people.

(Photo by V, copyright 2020)
The awning is 3 meters by 5 meters. It cannot be extended in more than the lightest breeze. We thought that wouldn’t be much of a problem. We didn’t realize how much wind we get here. If we had this decision to make again, we would look for a way to achieve a retractable cover that is stronger. There are solutions that could tolerate some wind. We couldn’t have afforded those solutions at the time, but after we recovered from the cost of the main project, we could have saved up for a more robust solution.
After all of this, we weren’t finished, but the pivotal element of our garden transformation was in place.
Impressive! I can't believe you had to clean each stone and then artfully arrange them to make it look like a well-fitted mosaic. I know you like the kid-friendly aspect, but it would look amazing with some trailing plants in planters on top, too. I had an awning on my house in Maine, but even a little wind would make it tug and yank on the supports. I finally removed it. In my current house I have a covered patio area that was roofed over with three skylights, which didn't really let in enough light, and it also had a significant hole in it. I had a carpenter yank all that out and put on transparent corrugated panels that makes it bright and cheery, keeps it probably 20 degrees warmer in winter, allows me to overwinter many of the summer plants, and acts as a greenhouse. Of course, it intensifies the heat in summer, but I open all the windows to help with that. If they get a hole or hail damage they can be easily replaced.
It looks fantastic, Bonnie! And the retractable awning really gives it a cozy feeling.